Retailers are constantly looking for new ways to generate revenue and stay competitive. One strategy …

![]()
Cloud-native POS platform for seamless omnichannel customer experience.
![]()
A single hub for all promotions campaigns.
![]()
The most advanced synchronization solution for databases and file systems.
![]()
Data configuration and batch automation across different disparate systems and vendors.
Retailers are constantly looking for new ways to generate revenue and stay competitive. One strategy …

Clienteling isn’t a new theory. It can be traced back hundreds of years when shopkeepers …

BOPIS, BORIS, and Curbside Pickup offer consumers and retailers the best of both worlds. …
The SymmetricDS product can synchronize data between over forty different database platforms with out of …

Compare and Repair for SymmetricDS Pro can compare two databases, report on the differences, and …
Mobile replication with Android edge devices in near real time to an on-premise or cloud …

Jumpmind President and CEO Joe Corbin to Lead Panel on Agility at Scale and Digitalizing …

Retail Technology Leader Jumpmind Brings Newfound Interactive and Personalized Digital Engagement to Inspire Shoppers at …

Retail Technology Leader Jumpmind Provides Enhanced Experiential Point of Sale and In-Store Engagement for Build-A-Bear Workshop …
![]()
Cloud-native POS platform for seamless omnichannel customer experience.
![]()
A single hub for all promotions campaigns.
![]()
The most advanced synchronization solution for databases and file systems.
![]()
Data configuration and batch automation across different disparate systems and vendors.

Let’s sync data to the cloud with Amazon Redshift and SymmetricDS Pro. I’ll take you through the steps to launch a cluster, sync data to it, and enable S3 for fast bulk loading.
The latest version of SymmetricDS 3.6 can load data to a Redshift database, syncing data with any of the other supported databases. Our customers are moving their internal data into the cloud to support their internal operations and applications. Some are using it to build a cost effective data warehouse, while others are distributing data geographically closer to the enduser for better application performance. SymmetricDS uses SSL-encrypted, web-based HTTPS connections to sync data, which makes it ideal for uses across wide area networks.
Redshift is Amazon’s managed data warehouse product which is available through the Amazon Web Services computing platform in the cloud. As a massive parallel processing (MPP) data warehouse, it uses columnar storage and compression principles to handle big scale analytic workloads, with datasets into the petabytes. In addition to performance benefits, a big reason for adoption is cost savings when compared to traditional data warehouse solutions. Amazon provides a web interface that makes it easy to deploy a new database, monitor, and manage it. Client software can use a common ODBC or JDBC driver to connect and run SQL queries.
First, we’ll need a Redshift database. Go to the Redshift section of the AWS Console and click “Launch Cluster”. Give the cluster a unique name and set a master user and password that you’ll be able to use to login. When you’re finished, you should be back at the Clusters page where you can see your new cluster listed. Click on the cluster you just created to see its status. It should be in a status of available and healthy before you can connect to it. The JDBC connection URL is also shown on the page.
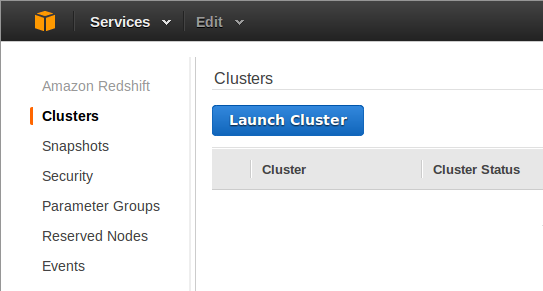 Launch a New Cluster |
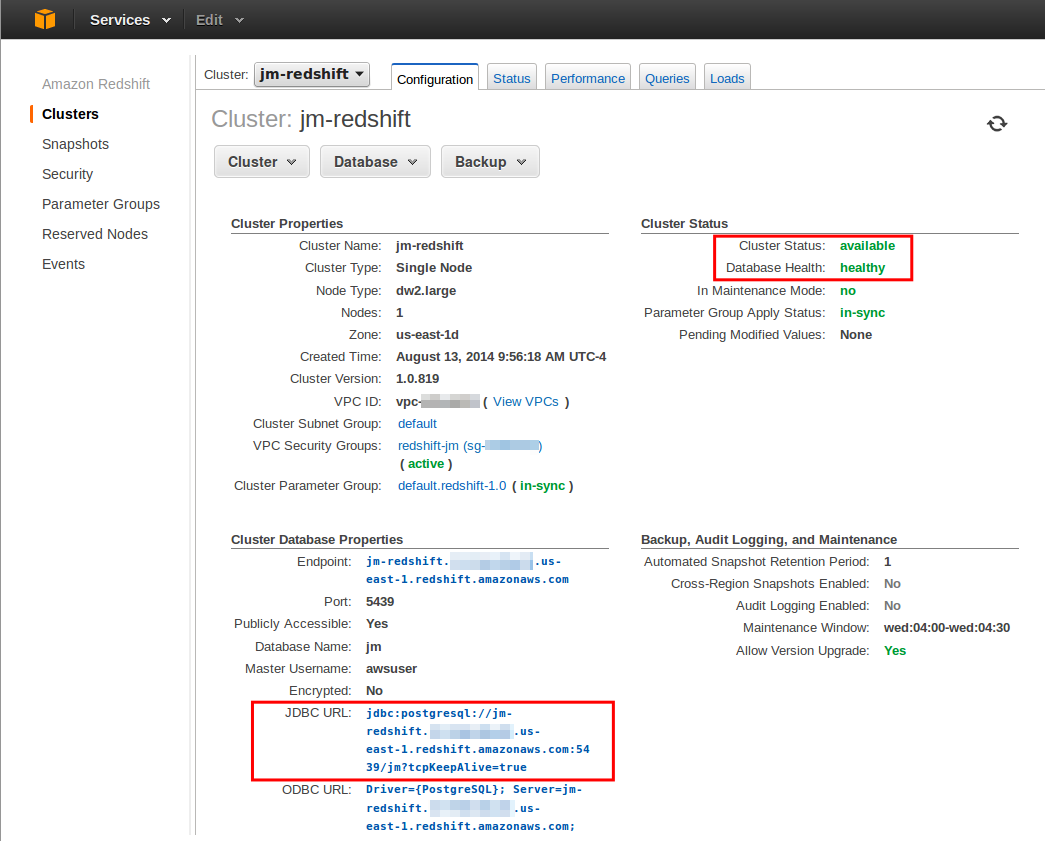 Cluster Status |
Run SymmetricDS Pro and create a master node for the database that will contain your configuration. The master database can be any of the supported databases, but not a target-only database like Redshift or Greenplum. For a quick demo, we’ll use the H2 database, which is built-in and self-managing.
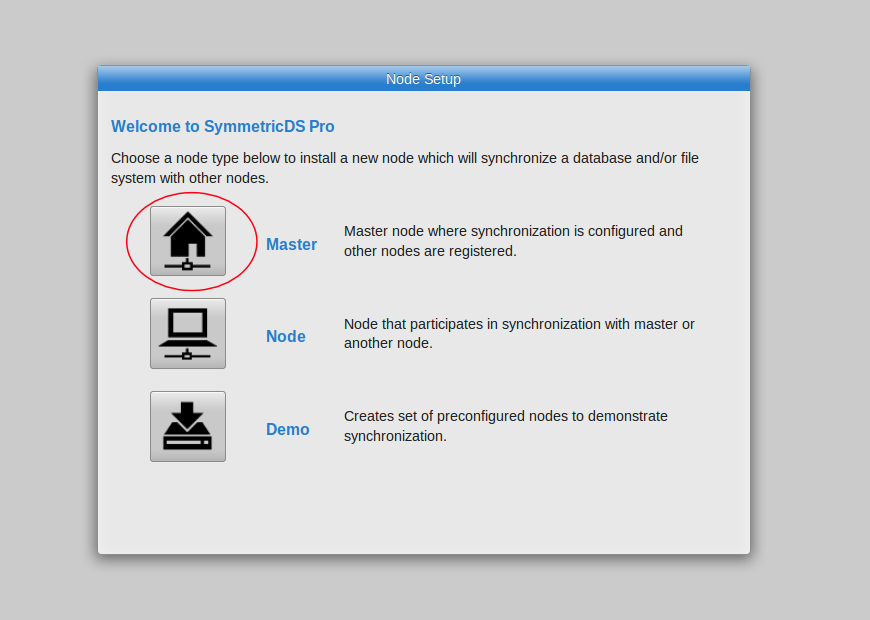 Create Master Node |
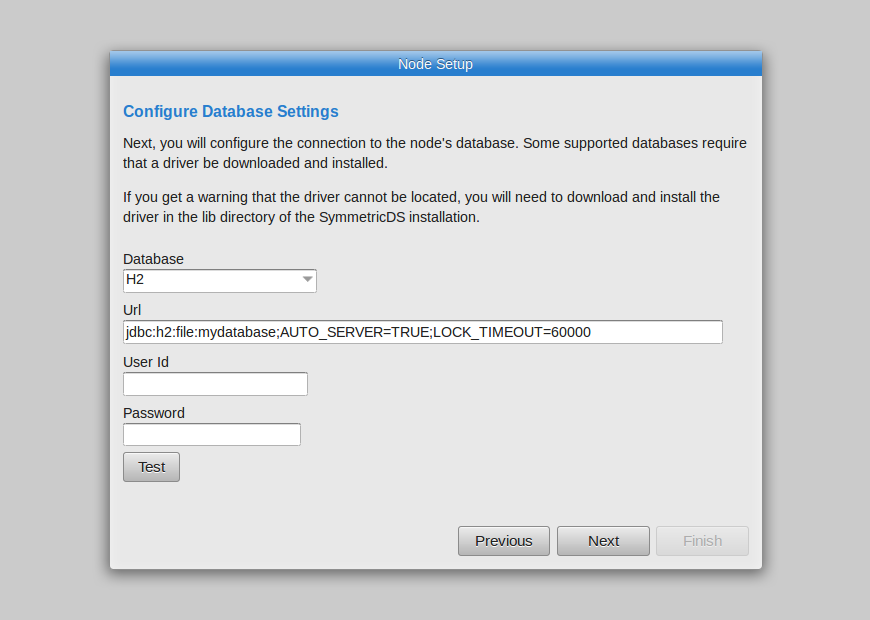 Use H2 Database |
 Select 2-Tier Profile |
To add Redshift as a target database, go to the Manage->Nodes screen and click on the “Add Node” button. We’ll choose a local node that runs in this instance. Alternatively, you could choose a remote node and run an instance of SymmetricDS in the elastic compute cloud (EC2). See Josh’s article on the difference between local and remote nodes. We’ll configure our local node with the JDBC information that we saw from the cluster page of the AWS Console.
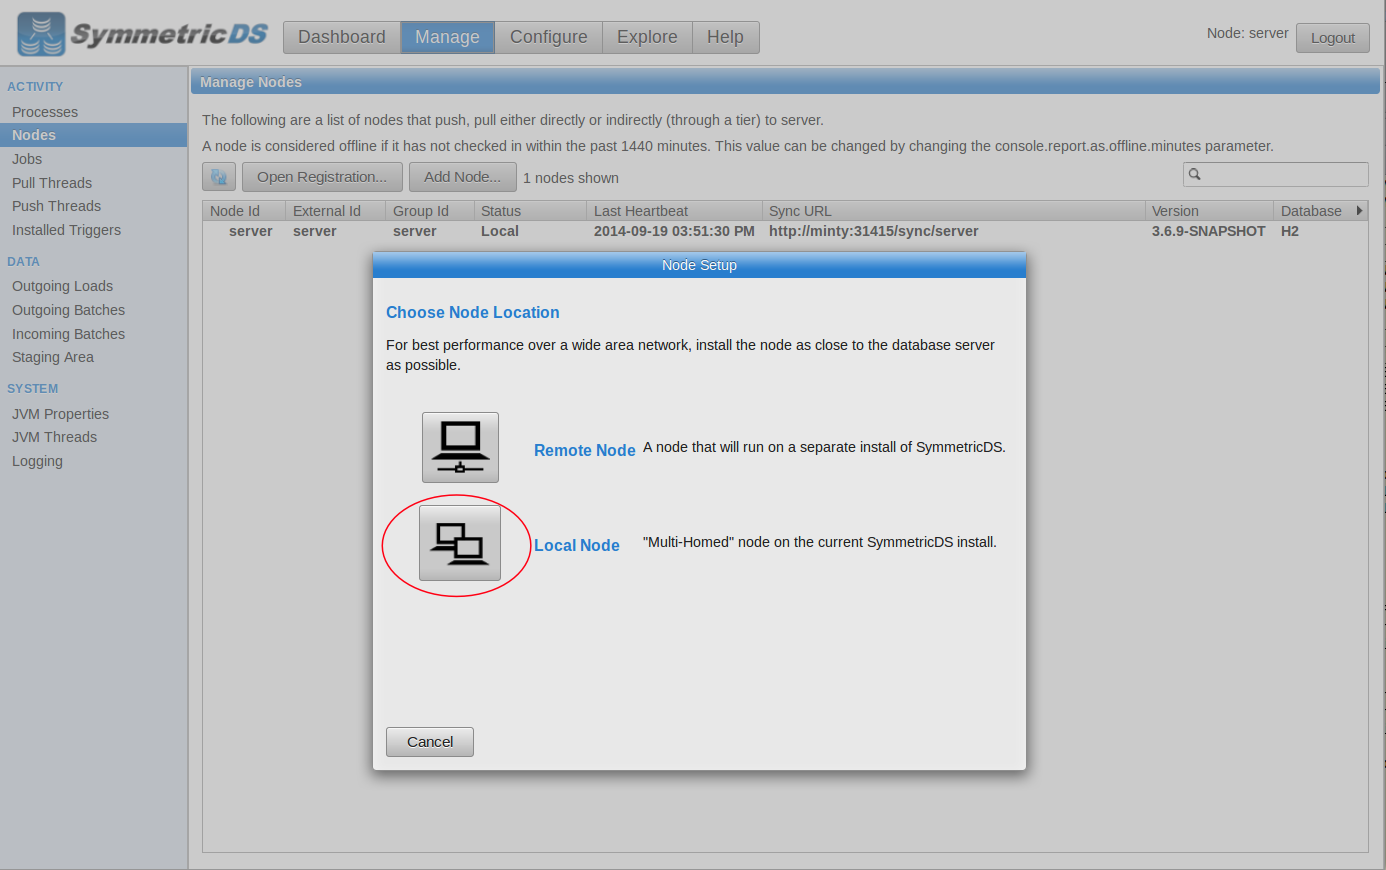 Select Local Node |
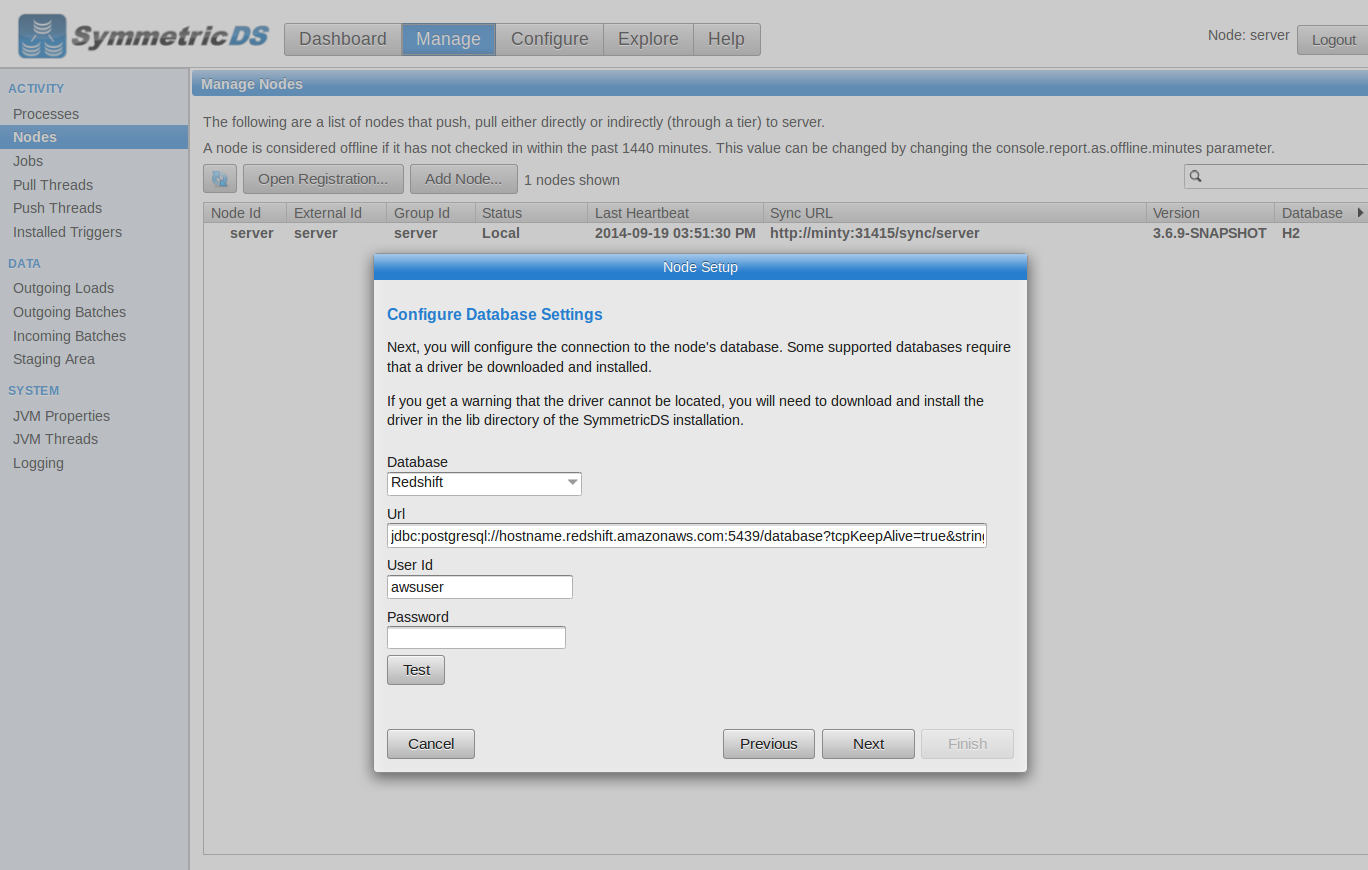 Connect To Redshift |
The node status should update to “Registered” and then you’re ready to configure. We can use the “Explore” tab to create a table in both databases. Under the “Configure” tab, we can click the “Auto Create” button to capture changes on the new table. The “Link” button lets us route data from the H2 database to the Redshift database.
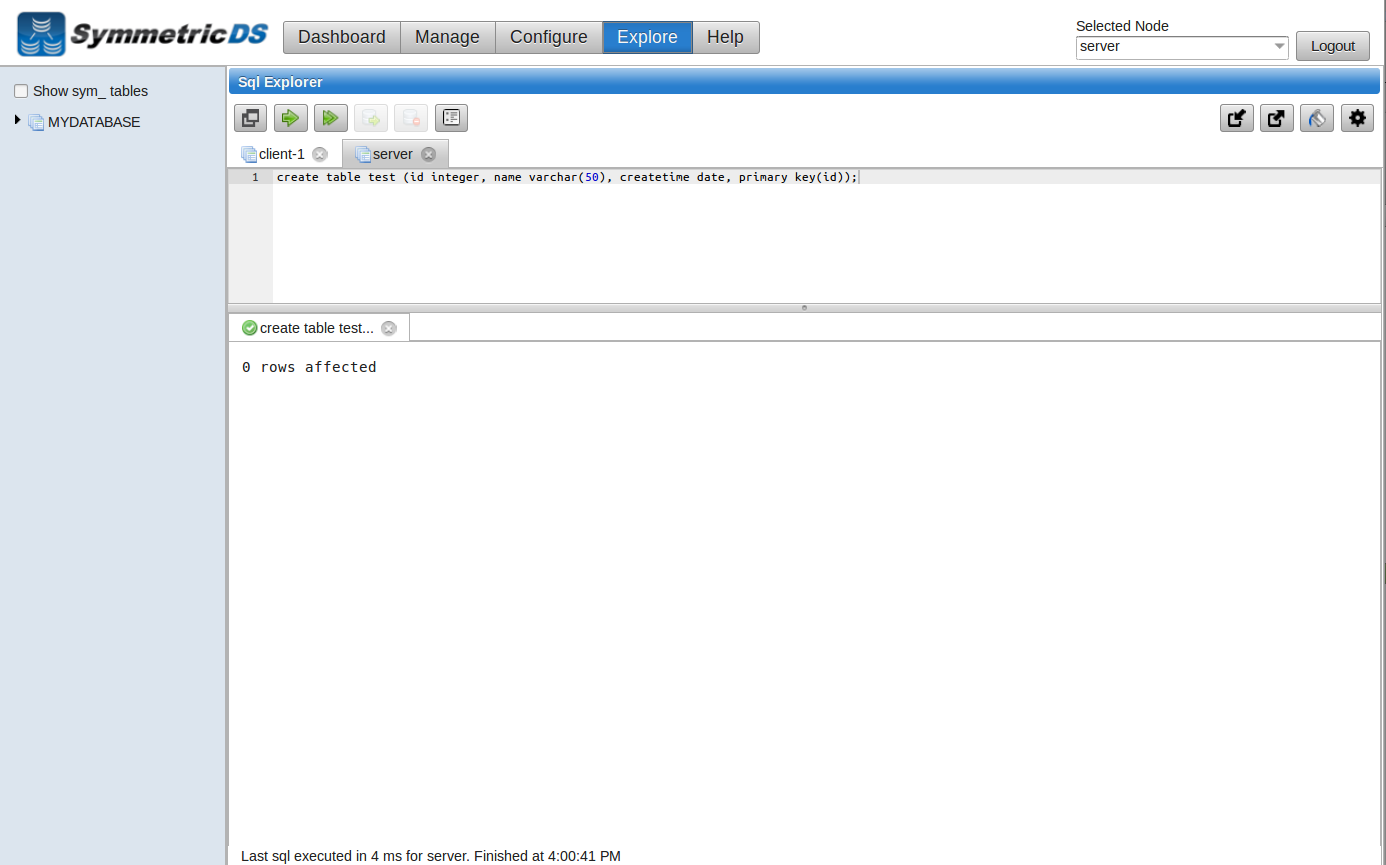 Create Table |
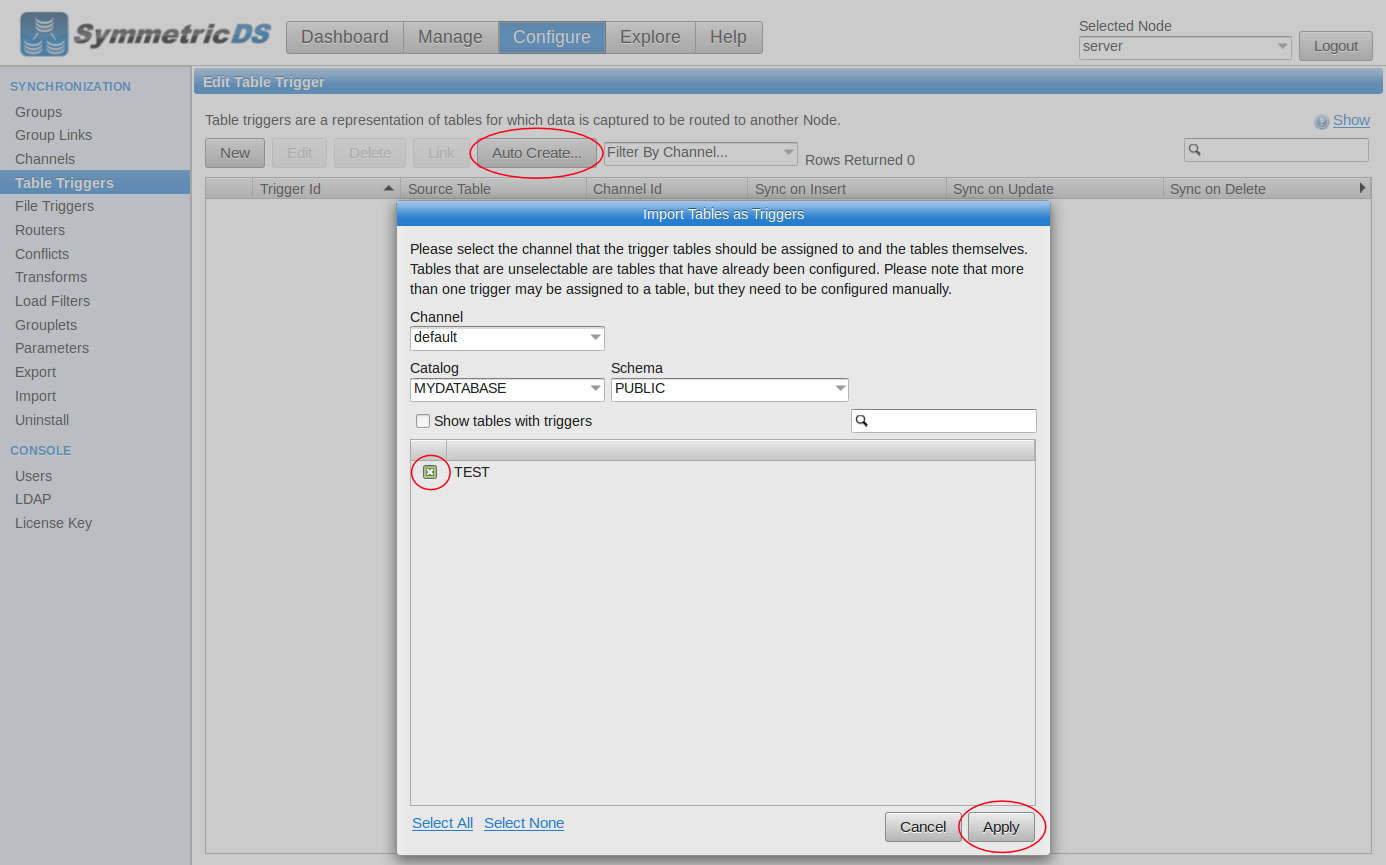 Create Trigger |
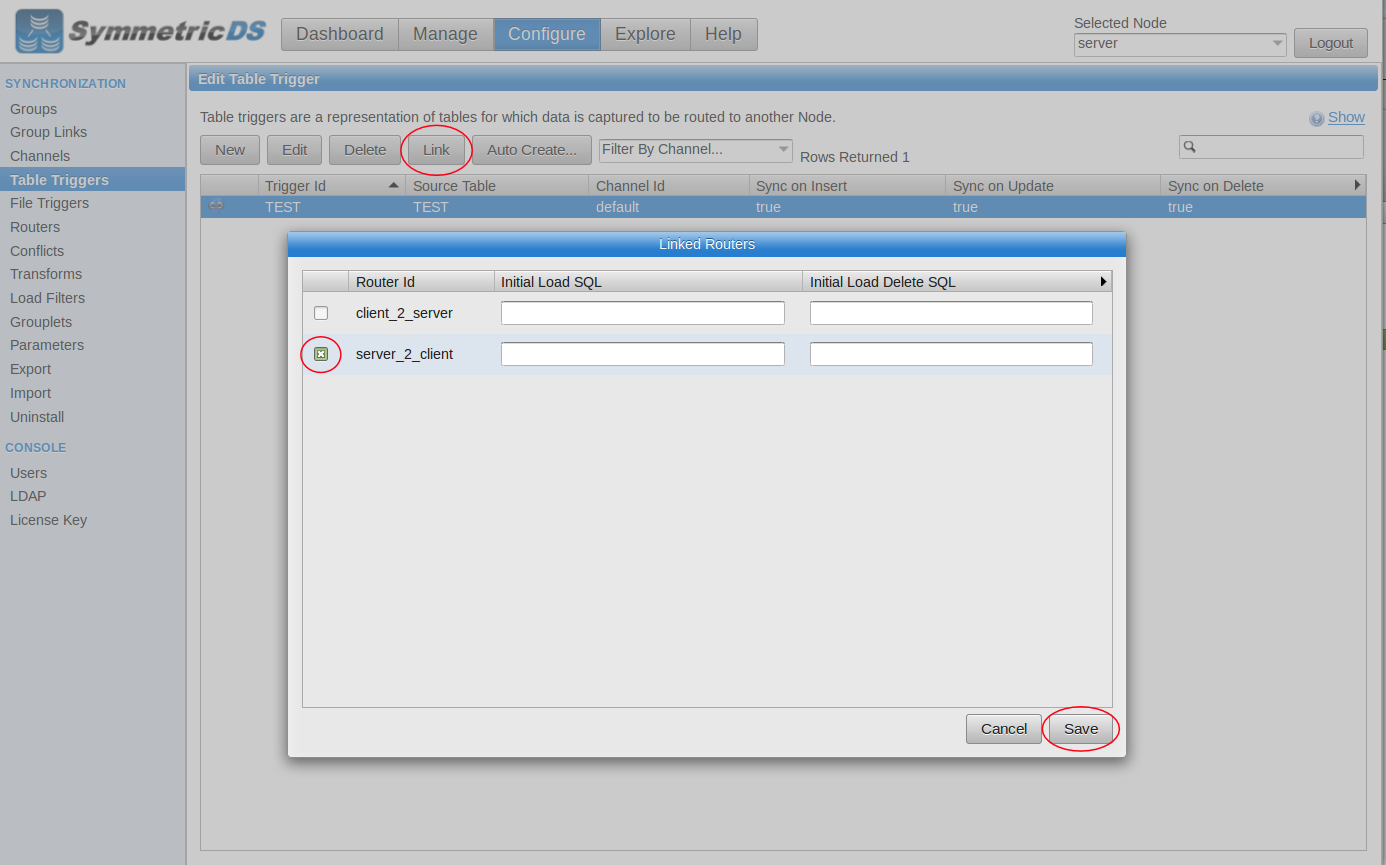 Link Trigger |
That’s it! You can put data in the table and it will sync over to the Redshift database now. Use the “Explore” tab again to manipulate data and verify results.
Now that we’re syncing data, we may find that loading large sets of data to Redshift over JDBC is slow. Fortunately, SymmetricDS includes a bulk loader to make things faster. The bulk dataloader uses Amazon S3 (Simple Storage Service) to quickly stage data before loading into Redshift. S3 is an online file storage service with a web interface for users and web services for programming. SymmetricDS first uploads the batch CSV data to S3, then issues a “COPY” statement for Redshift to load the data.
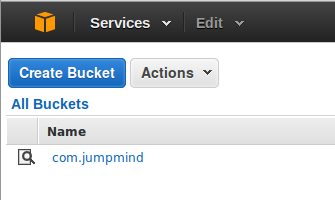
Go to the S3 section of the AWS Console and click “Create Bucket”. The bucket needs to be in the same region as the Redshift cluster. (In the future, we may add support for specifying different regions to COPY from.)
In the SymmetricDS web console, go to the Configure->Channels screen and edit a channel. Change the data loader type to “redshift_bulk” to use the bulk loader. By default, the “default” channel is used for changes while the “reload” channel is used for the initial load. Next, go to the Configure->Parameters screen and search for “redshift”. These parameters control the behavior of the bulk loader. We need to set the S3 bucket name, the access key, and the secret key.
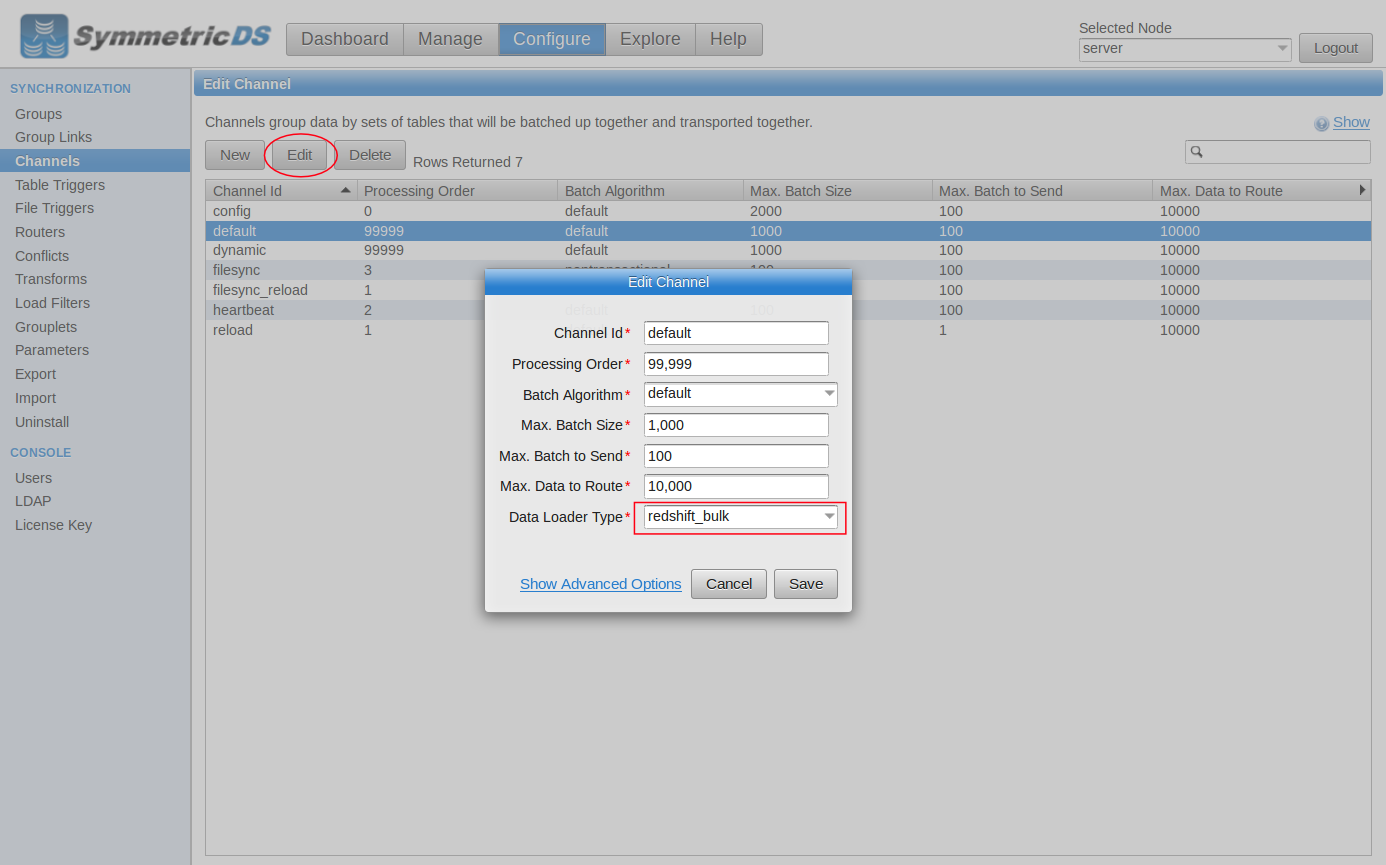 Edit Channel |
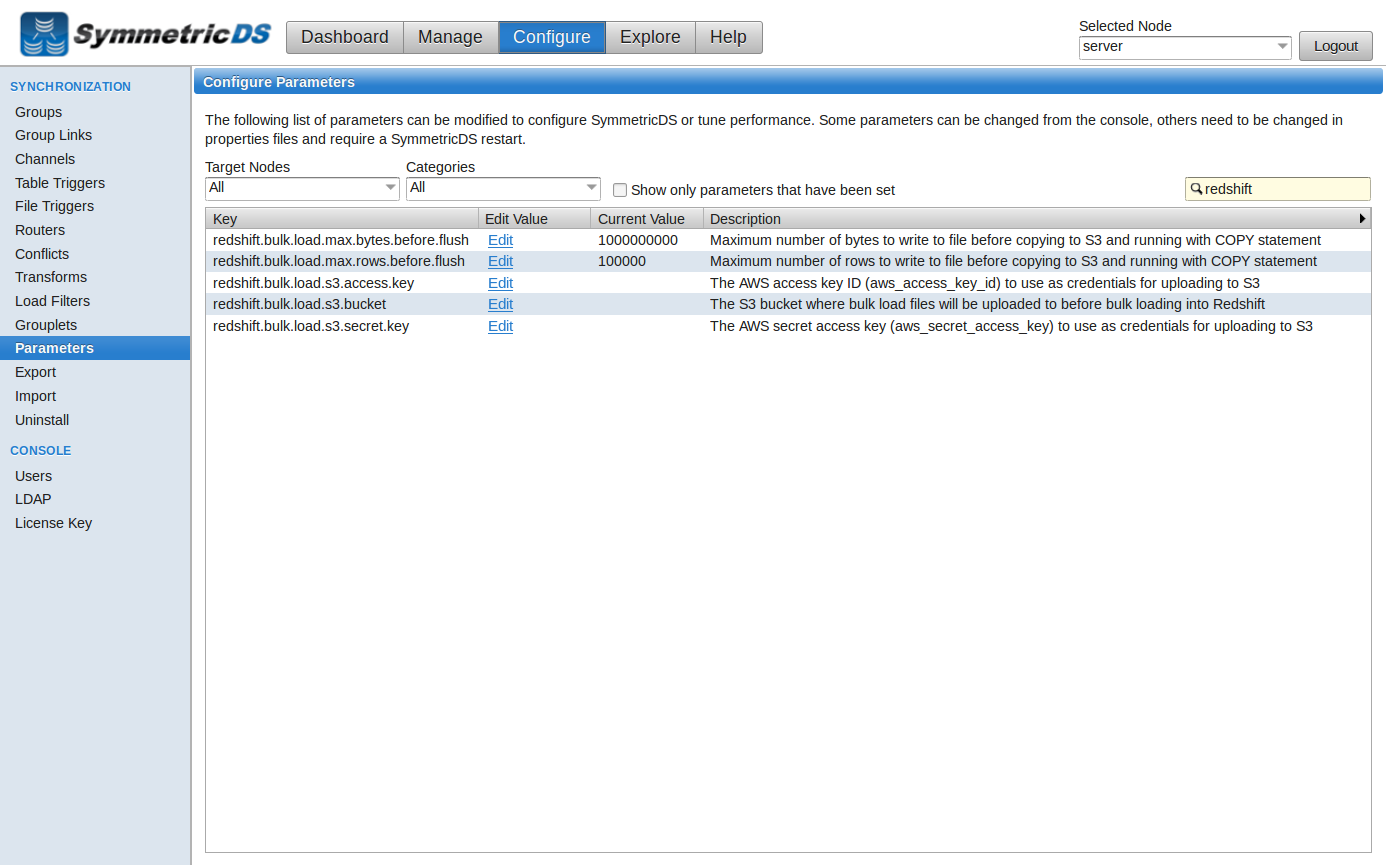 Edit Parameter |
Now throw a few thousand rows into the table and see how much quicker it syncs. From the “Explore” tab, you can use the “Database Fill” button or right-click on the table and select “Fill” to generate a bunch of random rows into the table. From the “Manage” tab and “Outgoing Batches” screen, you can monitor the progress to get timings on the speed improvement.
We’re pretty impressed with Amazon Redshift, and we foresee working with it and improving the SymmetricDS integration further. We’re already talking about ideas to implement soon. We’d like to use S3’s file splitting feature to break large batches up into multiple files that transfer to S3 in parallel for even faster bulk loading. We could also add compression and encryption to reduce transfer time and protect the data. And there’s an “unload” feature that could be used to enhance the reverse initial load so it pulls data out of Redshift using S3. Let us know what features are important to you and how we can help.