Beyond the Hype: What Retailers Really Want from Tech in 2025 Europe’s biggest retail conference …
Data Normalization using Transformations

When integrating data from one database to another, sometimes the schemas are not the same. Jumpmind has come across a number of projects where there was a need to transform a very denormalized database into more of a canonical or normal form.
Sometimes normalization is needed as part of a migration path to a newer and better data model.
Sometimes normalization is required just to feed another system.
Whatever the reason, SymmetricDS can:
- Capture the data change at the source database
- Transform it
- Transport it (across the across the web or just across your data center)
- Transform it more (if needed)
- Load it into your target database
We will take a look at a simple example to demonstrate how this can be accomplished. We will transform an AppUser table that contains name, role and password information into three tables at the target: user, user_role, and user_password.
For the purposes of this article, we will use embedded H2 databases that will be created automatically for you.
In SymmetricDS, each database that is participating in synchronization is represented by a SymmetricDS node. Nodes belong to groups that are linked. If you are not already familiar with SymmetricDS it might make sense to read an overview of SymmetricDS.
Do the following to get SymmetricDS installed and ready to go:
- Start by downloading SymmetricDS.
- Follow the installation instructions.
- After SymmetricDS is installed, unzip the configuration files into the engines directory of the SymmetricDS install.
- Start or restart the server.
Each properties file represent a node. In this case both nodes are hosted in the same SymmetricDS installation. This doesn’t have to be the case. For example, in a cloud deployment you might have a SymmetricDS installation in your datacenter that communicates over HTTP with a SymmetricDS installation hosted in the cloud.
Open the web console at http://localhost:31415/app. You are viewing the source node. You can switch the context to the target node by selecting it in the dropdown at the upper right corner.
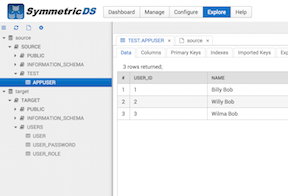
The tables structure we discussed has been created for you automatically. If you select the Explore tab, you will be able to view the tables we will be working with in the database explorer. The source tables have been created in the TEST schema. The target tables have been created in the USERS schema.
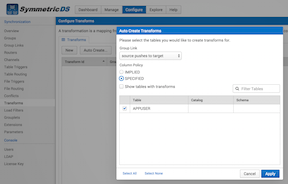
Now go the Configure > Transforms screen. Select “Auto Create”. The “Implied” option means that all columns from the original table will be passed through. We want to explicitly specify the column mapping ourselves, so select “Specified”.
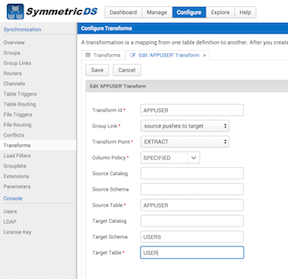
Now Edit the transform that was created. Set the “Target Schema” to “Users” because this is where our target tables reside. Set the “Target Table” to “User”. Save the transform.
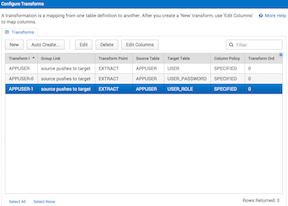
Now go ahead and “Auto Create” the mapping from “AppUser” to “User_Password” and “User_Role”. Note, in order for the tables to show up in the “Auto Create” dialog you will need to select “Show tables with transforms”.
Next we need to setup the column mappings.
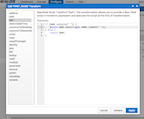
Select the first transform and press “Edit Columns”. You will need to add three columns. The user_id to id transform can be a copy transform. Be sure to mark it as the PK.
The next two transforms will be bsh transforms. We will map the source name column to a first_name and last_name column in the target table. We will look for the first space in the name column. Everything before the space is the first_name. Everything after the space is the last_name.
This is the bsh script for first_name:
if (NAME.contains(” “)) { return NAME.substring(0, NAME.indexOf(” “)); } else { return NAME; }
This is the bsh script for last_name:
if (NAME.contains(” “)) { return NAME.substring(NAME.indexOf(” “)); } else { return NAME; }
Now configure the column mappings for “User_Password” and “User_Role”.


Edit Transform Columns for User_Password and User_Role
Make sure you have saved and closed all of your edit tabs. It’s not time to test the transform. Insert the following SQL statements at the source. Inspect the target tables and experience the normalization of your data!
insert into test.AppUser values(1, ‘Billy Smith’, ‘user’, ‘$%^#$@#$%^’, null); insert into test.AppUser values(2, ‘Willy Smith’, ‘user’, ‘$%^#$@#$%^’, null); insert into test.AppUser values(3, ‘Wilma Smith’, ‘user’, ‘$%^#$@#$%^’, null);


