I just got back from Shoptalk in Las Vegas, and this year’s show hit differently …
![]()
Cloud-native POS platform for seamless omnichannel customer experience.
![]()
A single hub for all promotions campaigns.
![]()
The most advanced synchronization solution for databases and file systems.
![]()
Data configuration and batch automation across different disparate systems and vendors.
I just got back from Shoptalk in Las Vegas, and this year’s show hit differently …

When I joined Jumpmind, one of the first things that struck me was how consistently …

Physical retail is back as a growth engine; RSR research shows that 85% of retailers …
If you run SymmetricDS in production, you know the drill: dozens of nodes, constant data …
Overview Organizations today face the challenge of consolidating data from on-premise and cloud-based systems into …
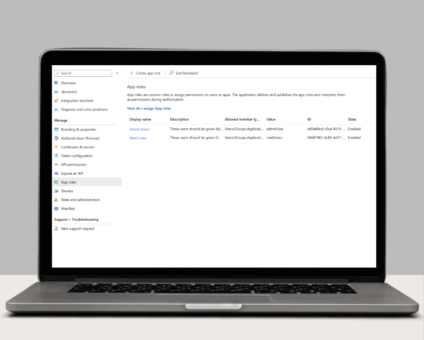
Single Sign-On with OAuth 2.0/OpenID Connect One of the many new features included in version …

Jumpmind Powers Point of Sale and Promotions Execution for Landmark Retail, One of the Largest …
Retail Technology Leader Jumpmind to Enable Mobile Point of Sale and Inventory Management for DTLR/VILLA …
The retailer is charting its next chapter with retail technology modernization to power inspired omnichannel …
If you run SymmetricDS in production, you know the drill: dozens of nodes, constant data …

LONDON, March 17, 2026 — Jumpmind, a leading provider of innovative retail technology solutions, today …

Last week, I had the opportunity to be at EuroShop 2026 in Düsseldorf, Germany, the …
![]()
Cloud-native POS platform for seamless omnichannel customer experience.
![]()
A single hub for all promotions campaigns.
![]()
The most advanced synchronization solution for databases and file systems.
![]()
Data configuration and batch automation across different disparate systems and vendors.

This article will show you how to use SymmetricDS to load data into a managed instance of SQL Server running in Azure. Once this setup is complete you will have a target Azure-managed instance database that is ready for an initial load of data with change capture support to keep it in sync.
Here is what is expected to be in place and outside the scope of this article before starting.
Setting up a managed storage space in Azure will allow for faster loading of data into Azure initially through the use of the bulk insert commands SQL Server provides.
1. First create a new managed storage area if you did not already.
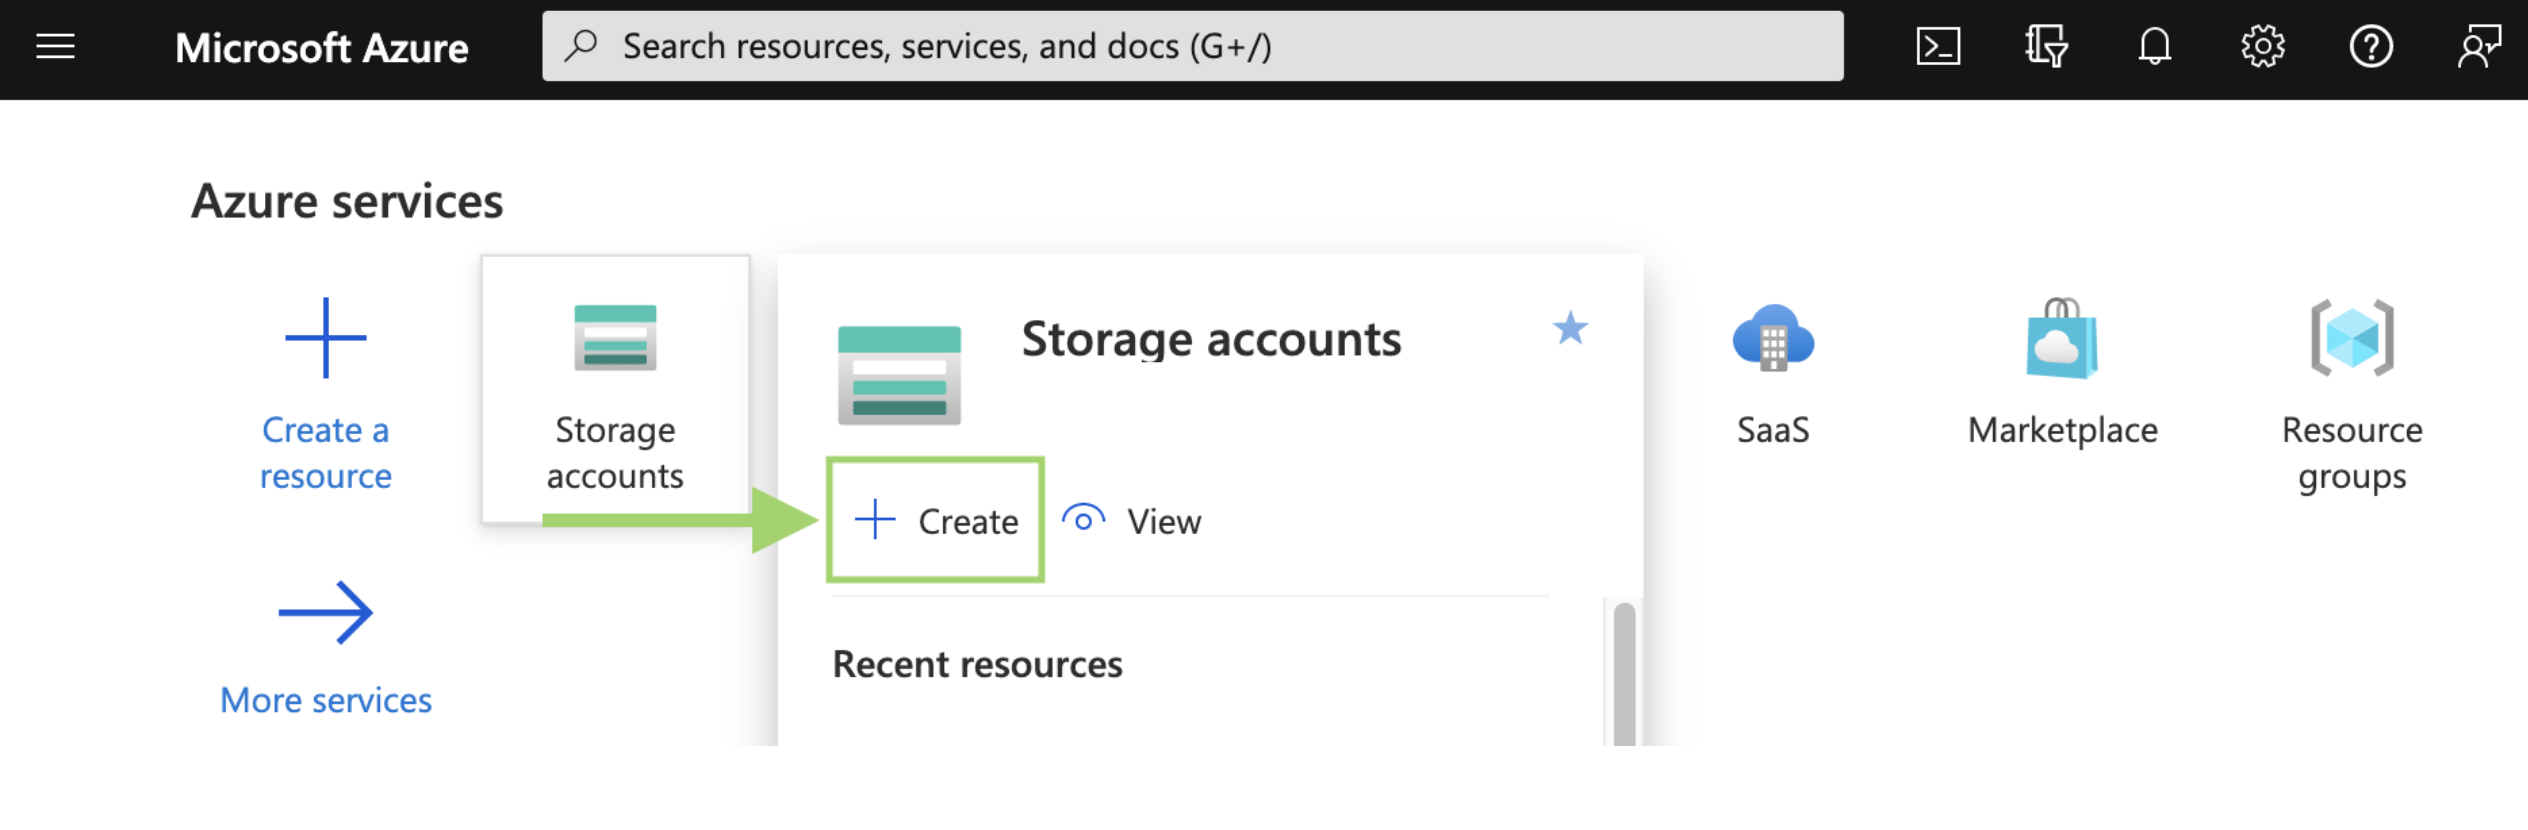
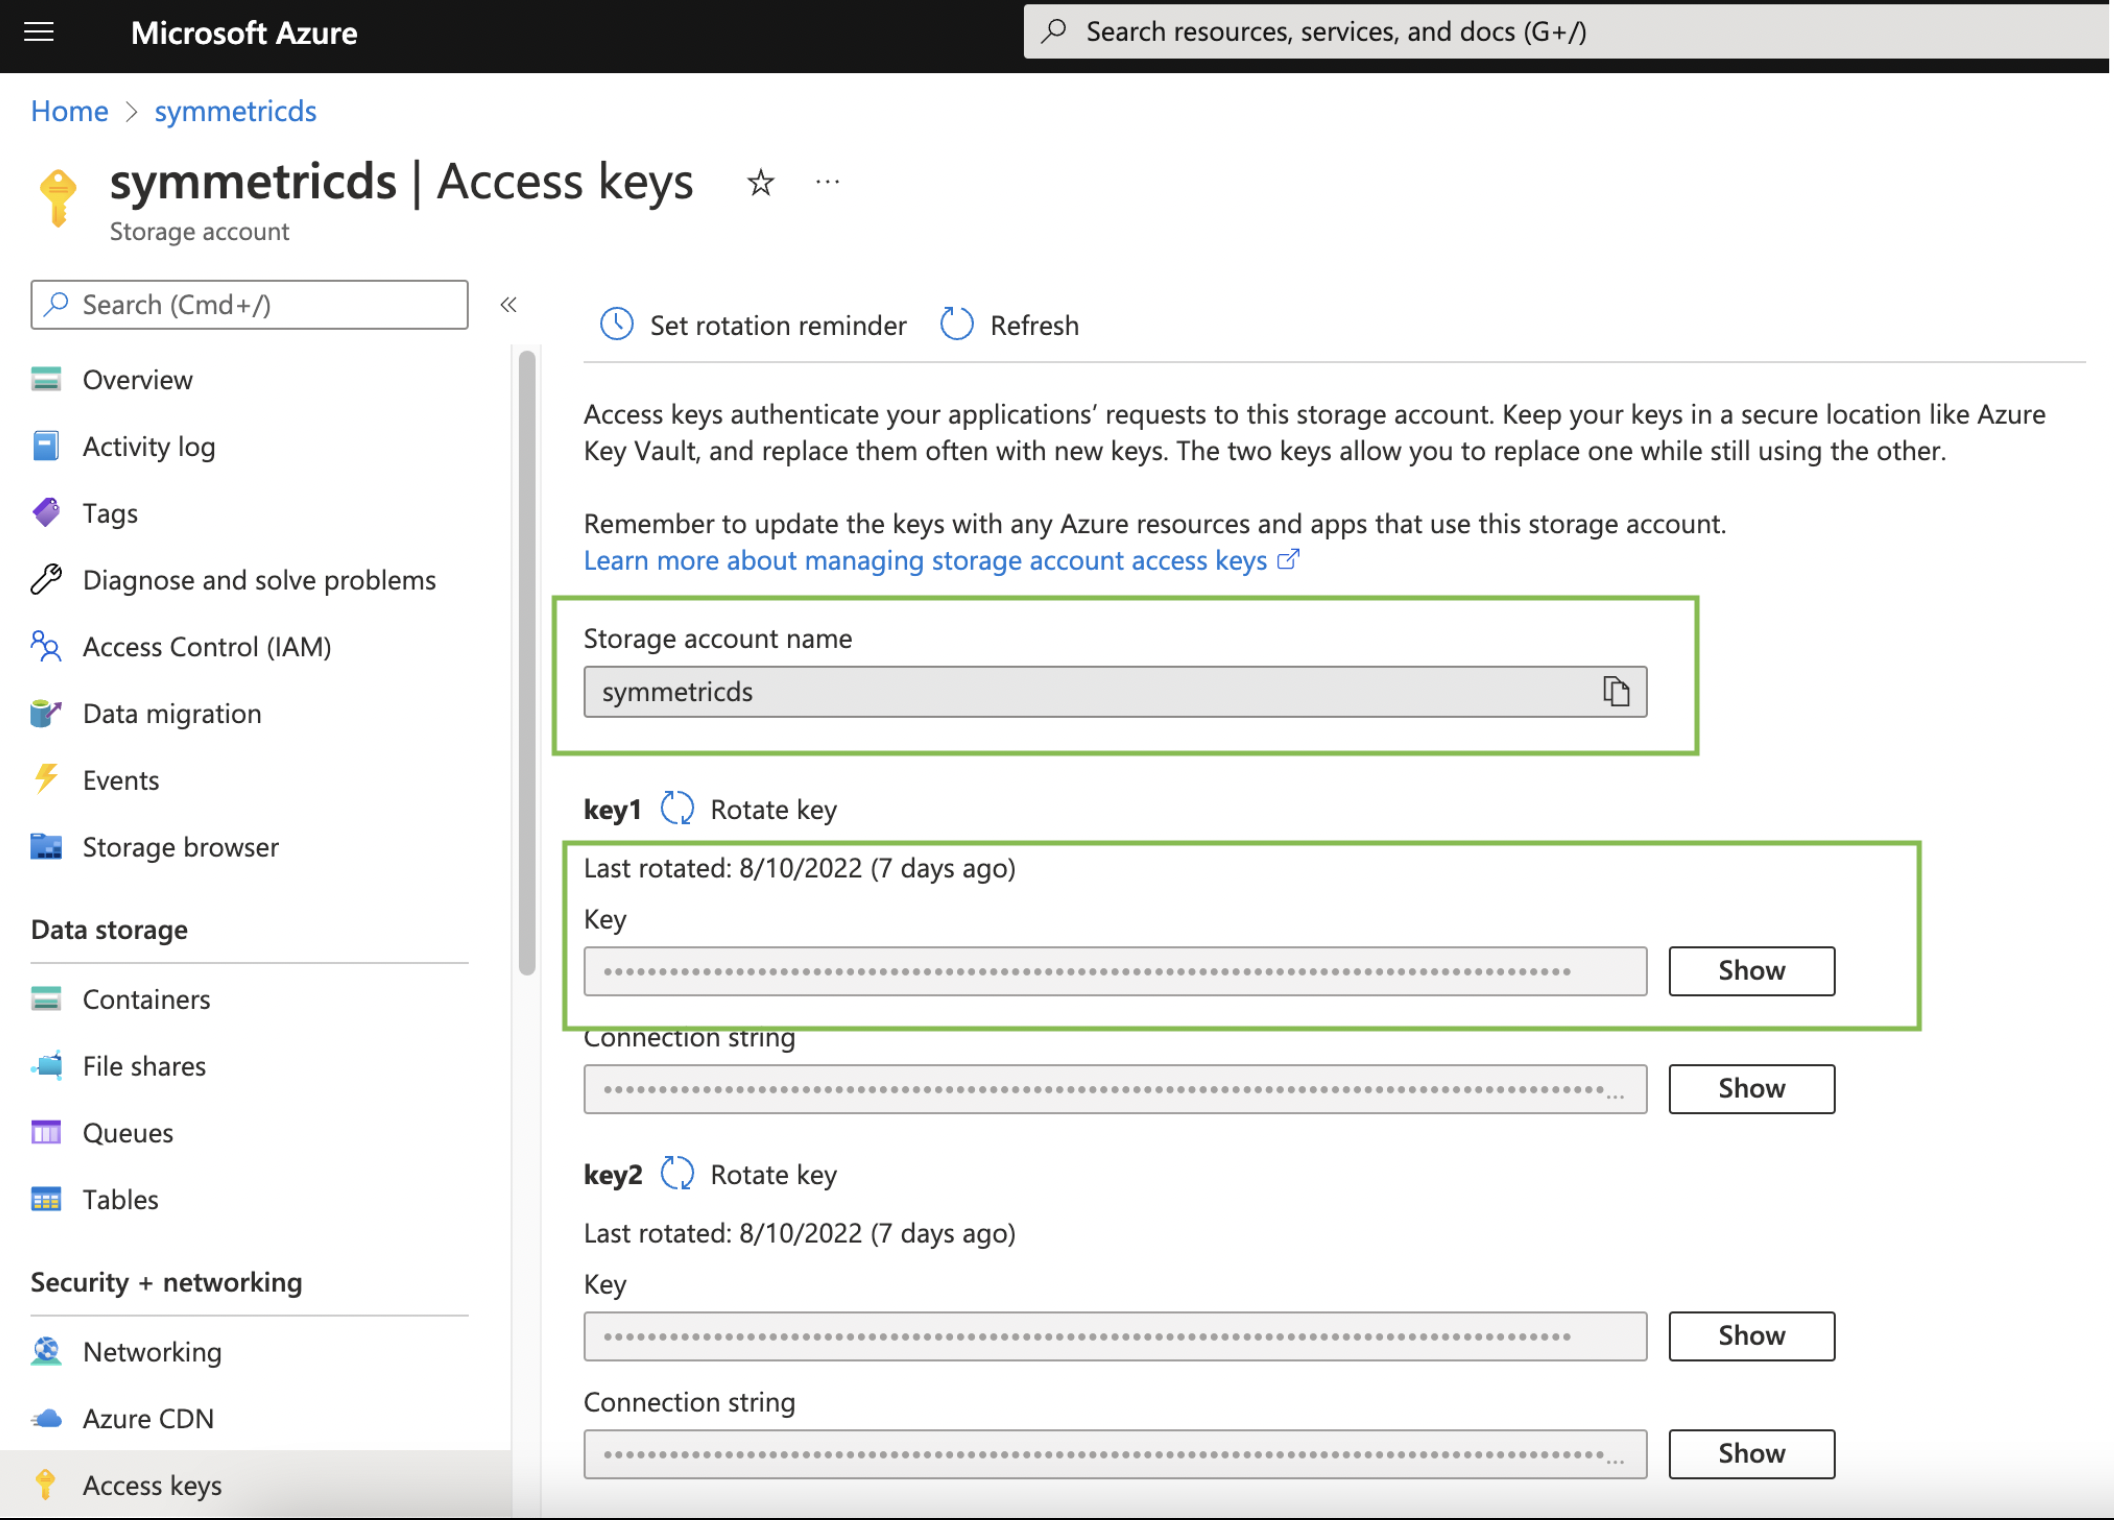
2. Once the storage account is created, record the account name and the access key that will be needed by SymmetricDS to connect to it later.
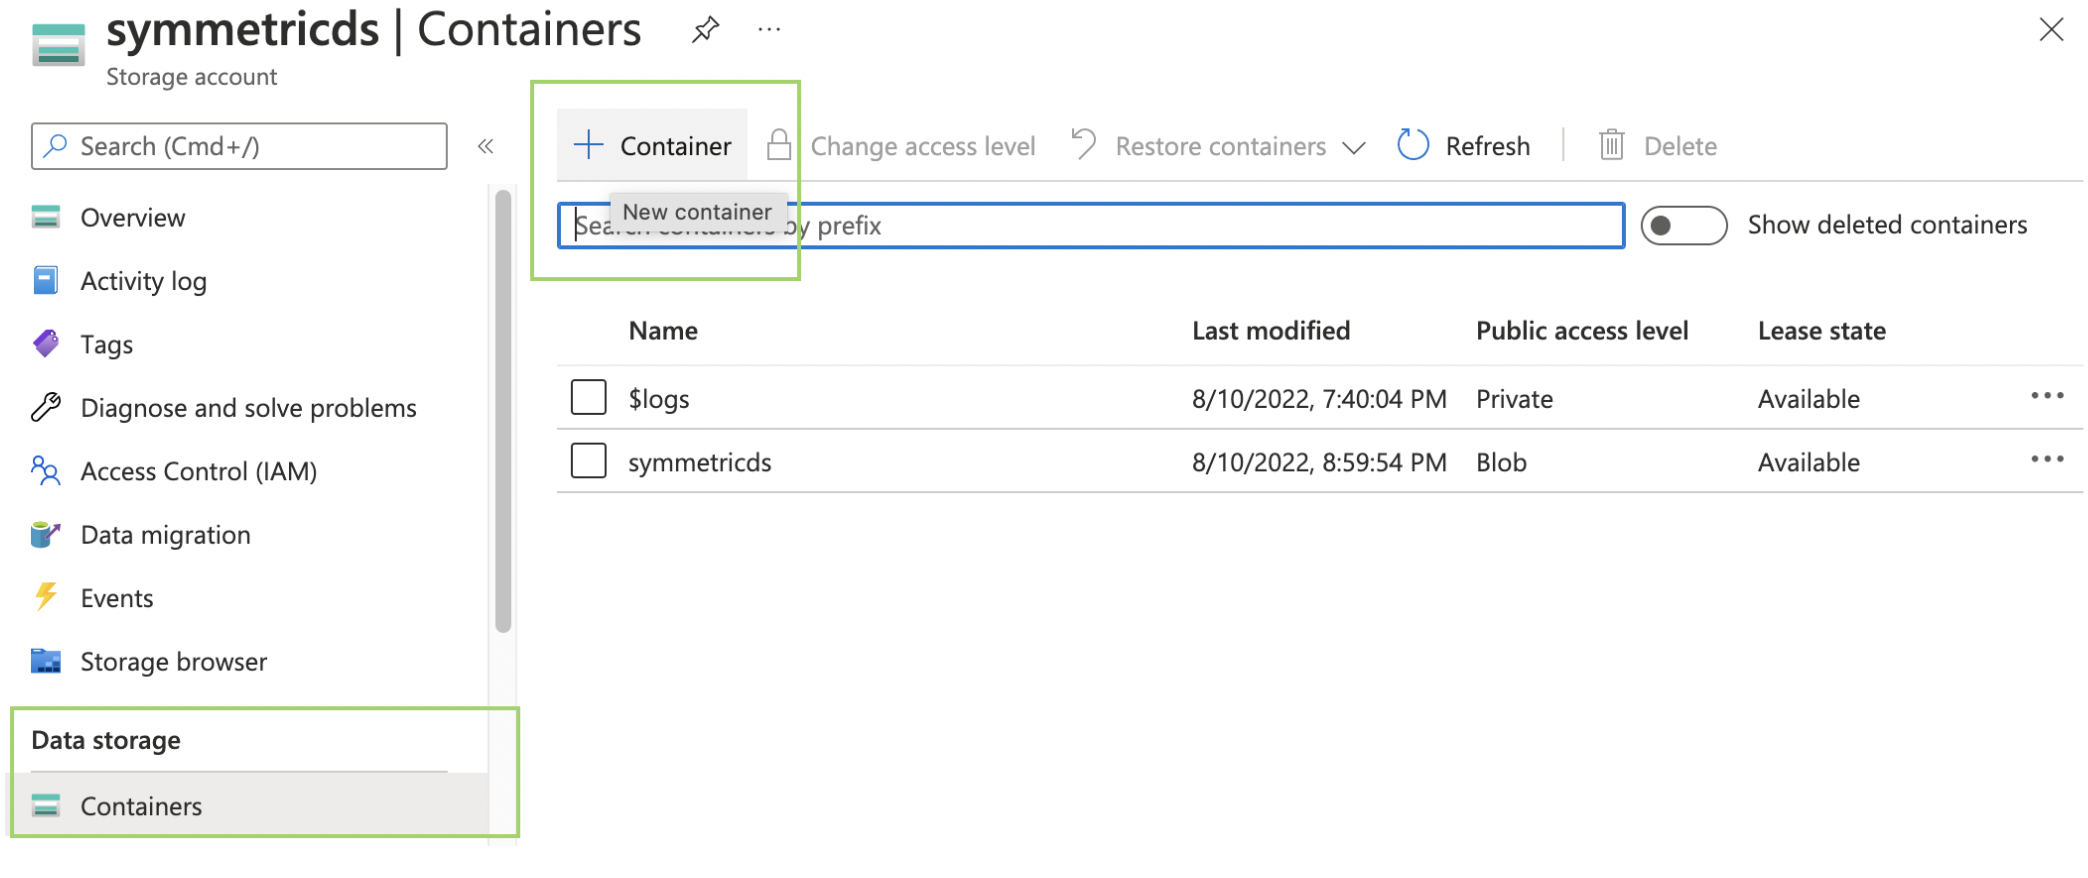
3. Next create a blob storage container within the managed storage account just created above.
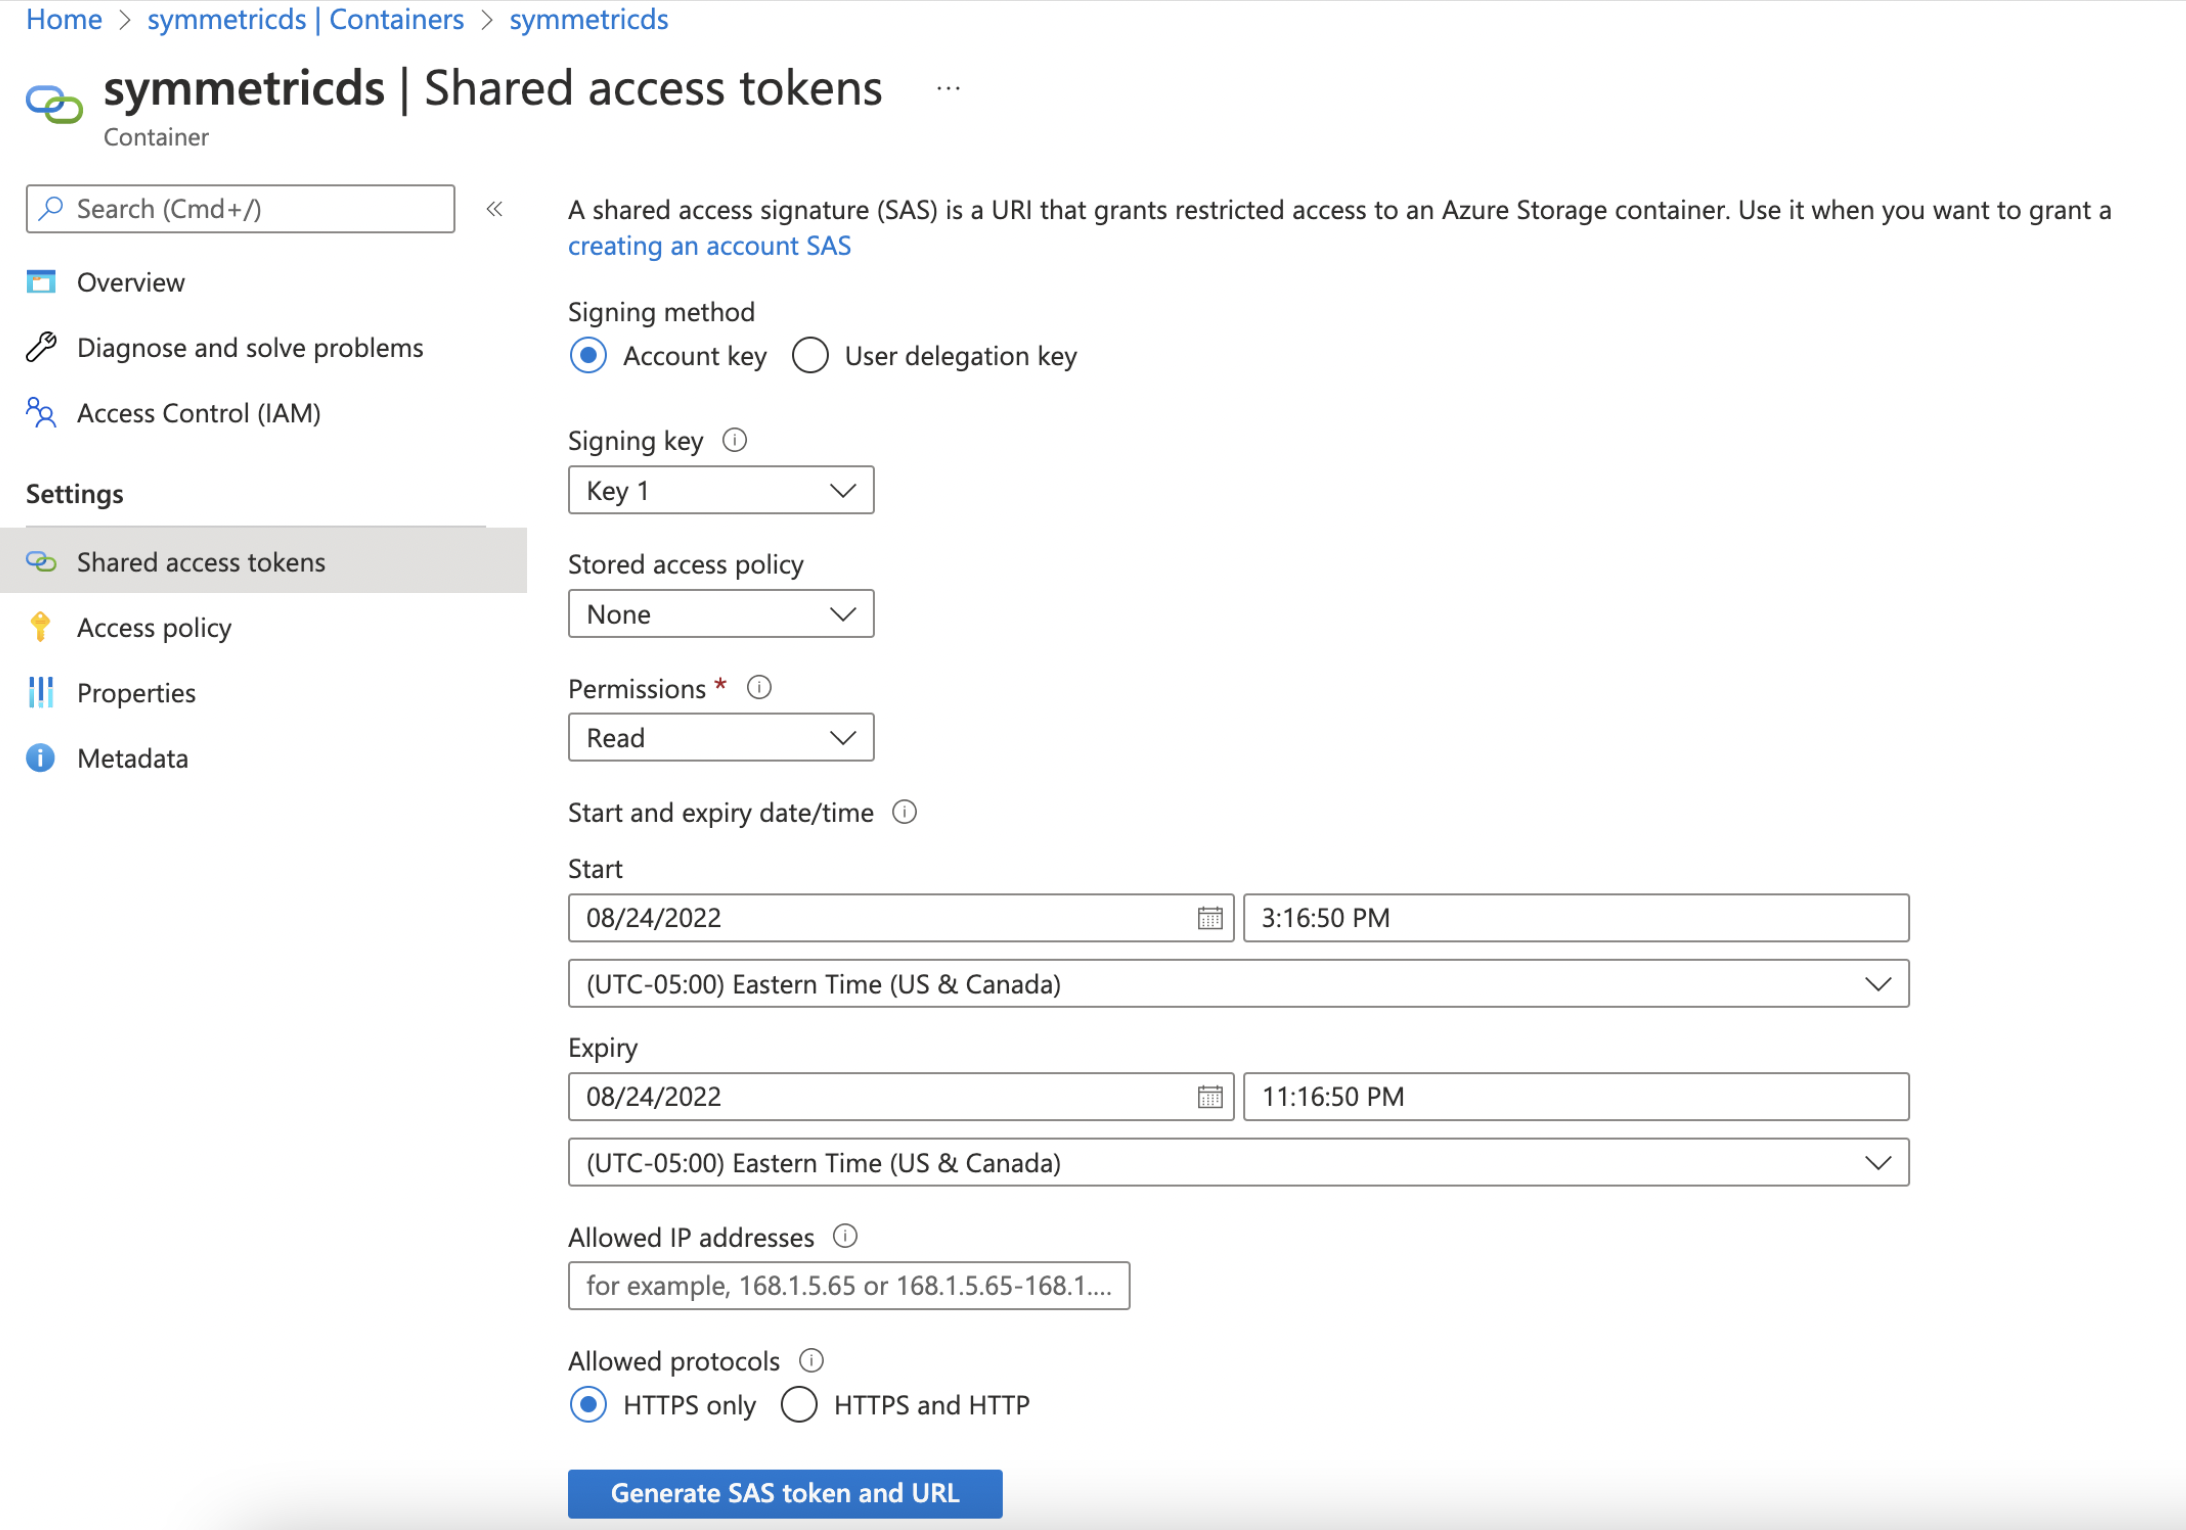
4. Once the blob container is created you will need to generate and recored the shared access (SAS) token that will be needed to connect to the container as well by SymmetricDS for bulk loading. These have an expiration date so create one with an appropriate expiration date so you know when it expires and will need to regenerate a new one and update SymmetricDS properties.
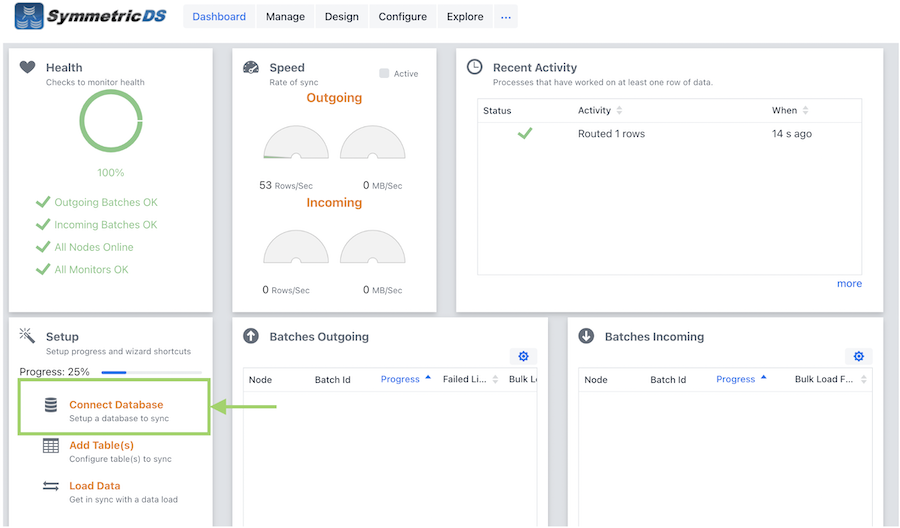
1. Assuming SymmetricDS is installed and running per the prerequisites above, the next step is to set up a SymmetricDS node (database connection) to the Azure-managed instance. On the dashboard, there is an add database connection shortcut that will open the connection wizard to begin this setup.
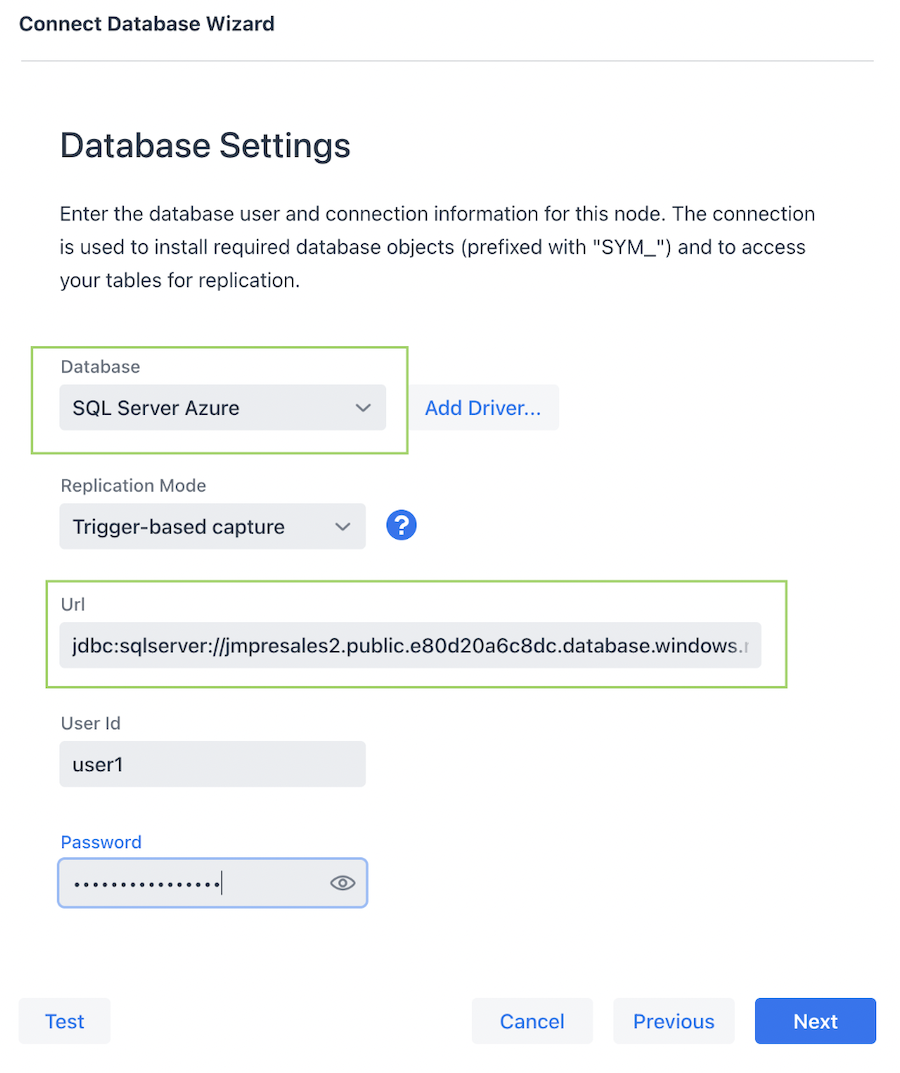
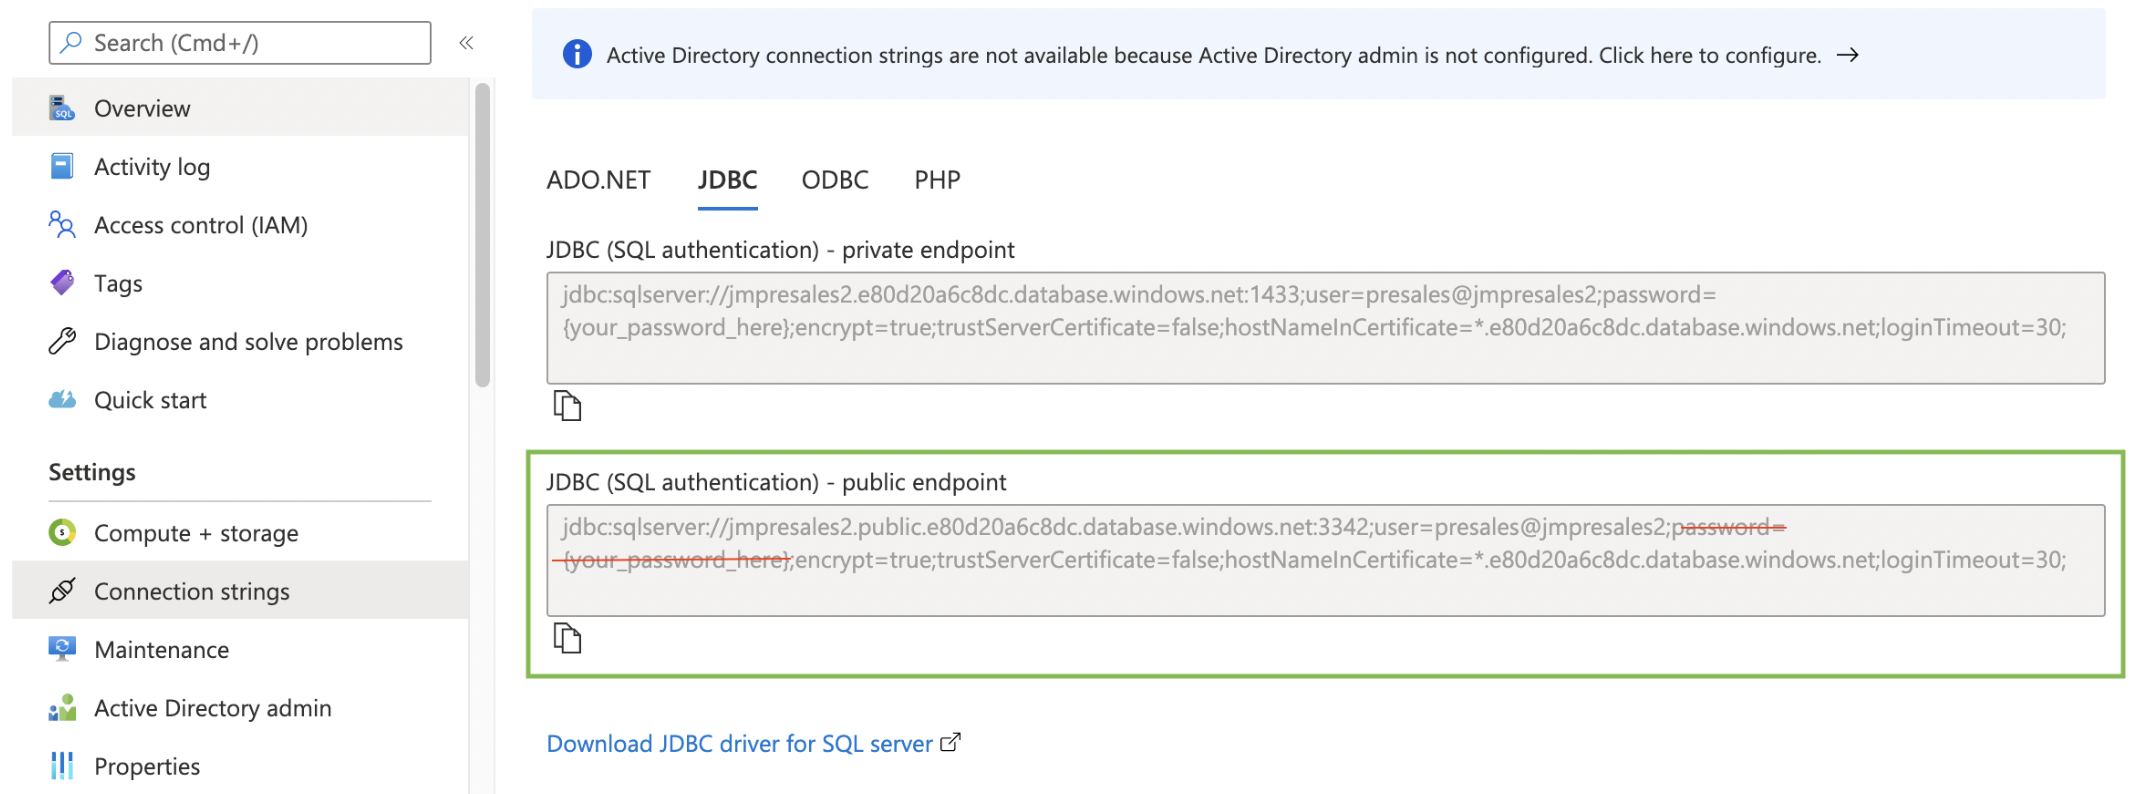
2. Next select SQL Server Azure as the database type and provide the JDBC connection URL to the Azure instance. You can obtain the Azure JDBC URL on the “connection strings” menu in Azure (see second screenshot below)
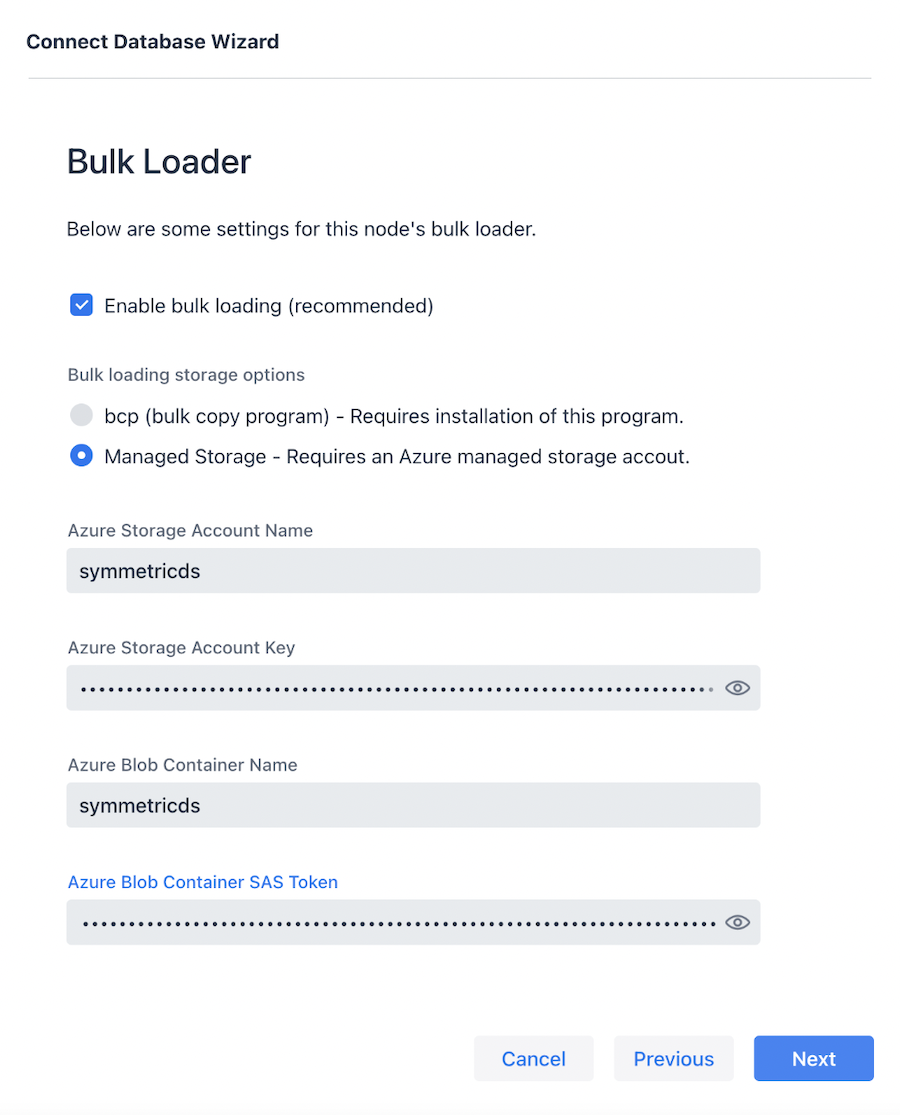
3. When prompted in the wizard about setting up bulk loading, select the managed storage option. Then provide the account name to the storage created above along with the account key for the storage container. Then you will need to provide the container name and SAS token to connect to the specific blob storage.
4. Finally finish the connection setup wizard and you have an Azure-managed instance SymmetricDS node that is ready for a bulk data load. Future steps beyond the scope of this article would be to run through the “Add Tables” wizard (also a shortcut on the dashboard). Once tables have been selected for replication with the new Azure node as the target an initial load can be requested by going through the “Load Data” wizard (also a shortcut on the dashboard) to seed the new Azure-managed instance with its initial data set.