Physical retail is still where the magic happens. According to new research by RSR, 85% …

![]()
Cloud-native POS platform for seamless omnichannel customer experience.
![]()
A single hub for all promotions campaigns.
![]()
The most advanced synchronization solution for databases and file systems.
![]()
Data configuration and batch automation across different disparate systems and vendors.
Physical retail is still where the magic happens. According to new research by RSR, 85% …
Beyond the Hype: What Retailers Really Want from Tech in 2025 Europe’s biggest retail conference …

What a fun week it was for women from across the country who came together …
Single Sign-On with OAuth 2.0/OpenID Connect One of the many new features included in version …
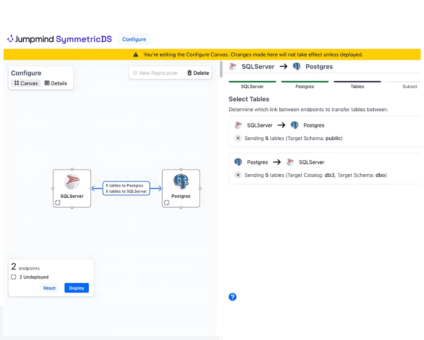
The new release of SymmetricDS Pro 3.16 data replication software simplifies setup, improves performance, and …
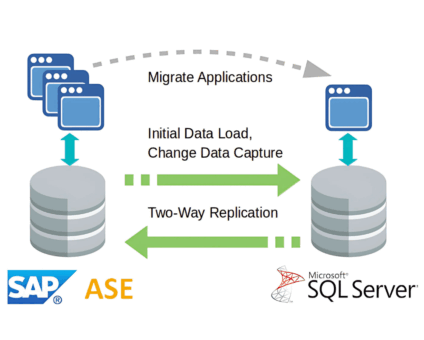
Sybase ASE (more recently known as SAP Adaptive Server Enterprise), announced its end of mainstream …

Jumpmind Powers Point of Sale and Promotions Execution for Landmark Retail, One of the Largest …

Retail Technology Leader Jumpmind to Enable Mobile Point of Sale and Inventory Management for DTLR/VILLA …

The retailer is charting its next chapter with retail technology modernization to power inspired omnichannel …

The partnership will drive innovation, expand global reach, and reinforce Jumpmind’s position as a leader …

36% of retailers say meeting the demands of hyper-informed customers is one of the top …

43 percent say handling online order returns in-store is a top challenge, and that increases …
![]()
Cloud-native POS platform for seamless omnichannel customer experience.
![]()
A single hub for all promotions campaigns.
![]()
The most advanced synchronization solution for databases and file systems.
![]()
Data configuration and batch automation across different disparate systems and vendors.
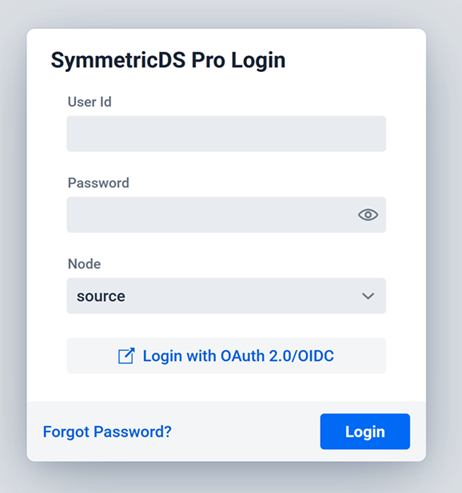
Single Sign-On with OAuth 2.0/OpenID Connect
One of the many new features included in version 3.16 of SymmetricDS Pro is the ability to sign in to the web console using OAuth 2.0/OpenID Connect authentication.
OAuth 2.0 is a protocol that lets applications securely access user data from other services without needing the user’s password, and OpenID Connect (OIDC) builds on OAuth 2.0 to provide a standardized way to verify a user’s identity. With OAuth 2.0/OIDC authentication, users only have to sign in once to access multiple applications. This experience is known as single sign-on, or SSO. To learn more about OAuth 2.0 and OpenID Connect, see this OAuth 2.0 and OpenID Connect overview.
The first step of setting up OAuth 2.0/OIDC authentication for SymmetricDS Pro is to configure your identity provider. While this article uses Microsoft Entra ID as its example, there are many other identity providers that have the same features and can be configured in a similar way.
Start by creating a new application within your identity management software to act as an OAuth 2.0/OIDC identity provider for SymmetricDS. You will then to need to configure your Redirect URI for SymmetricDS:
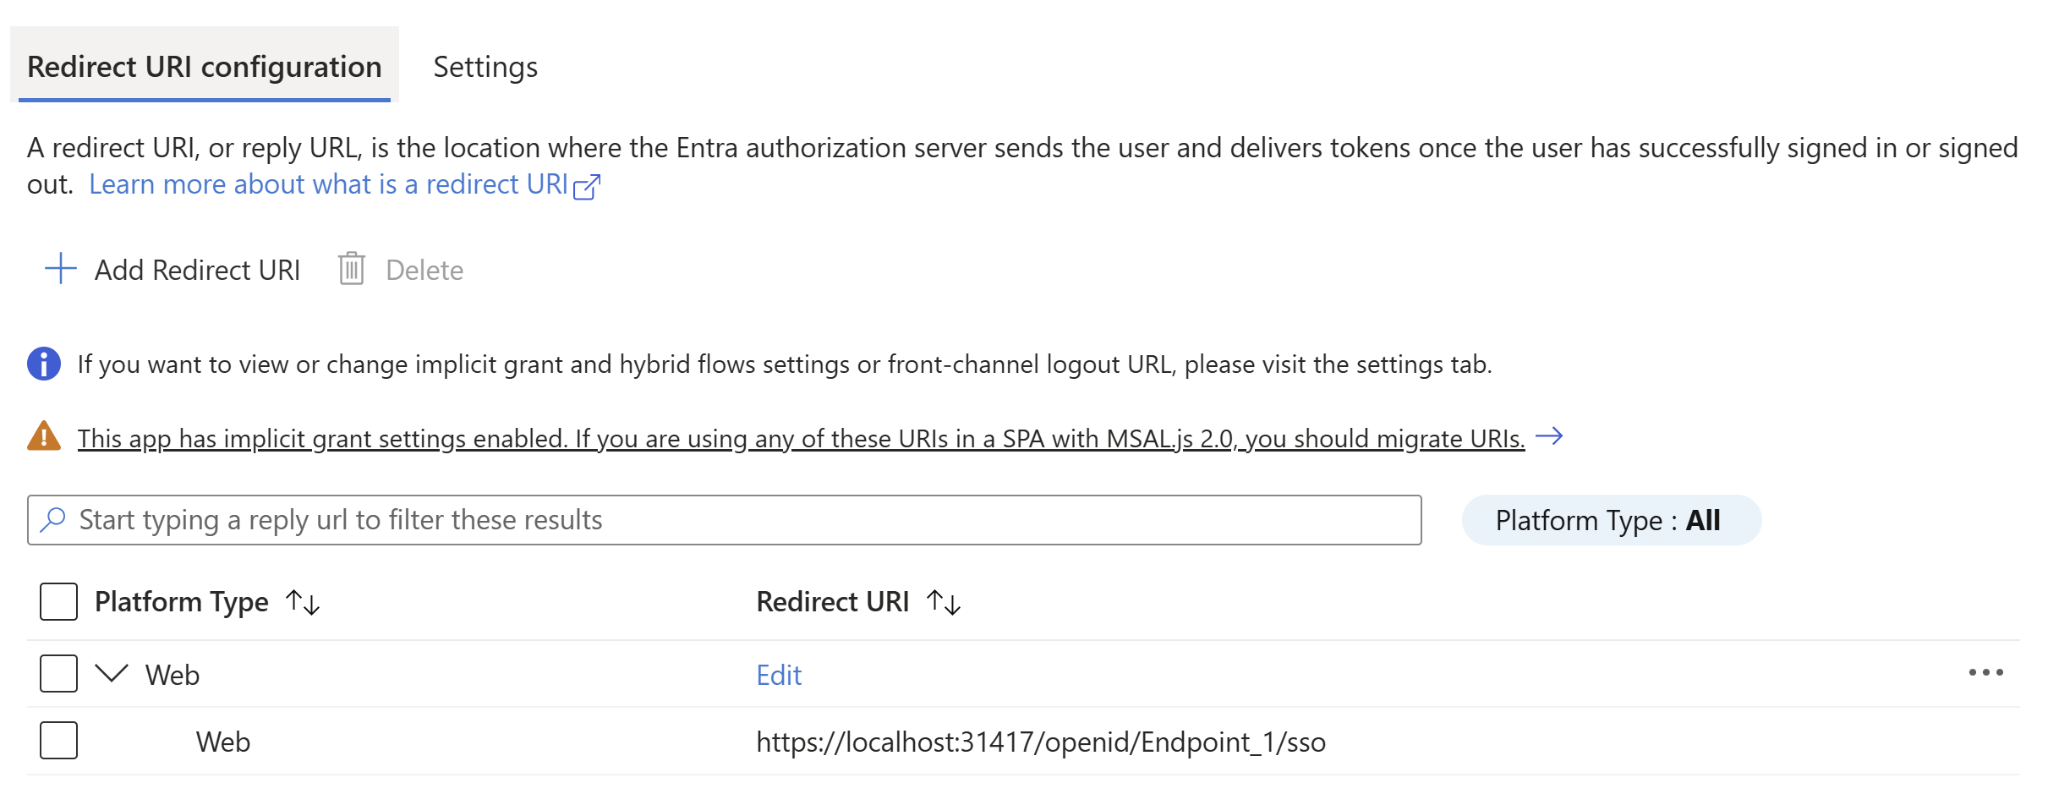
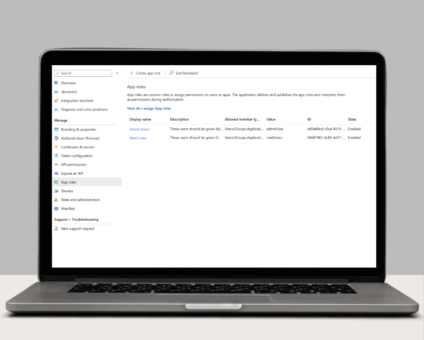
You will need to specify one Redirect URI for each node that users should be allowed to log in to using OAuth 2.0/OIDC authentication. The Redirect URI is automatically generated by SymmetricDS based on your node’s Sync URL, and can be copied directly from SymmetricDS via the Configure Single Sign-On Screen:
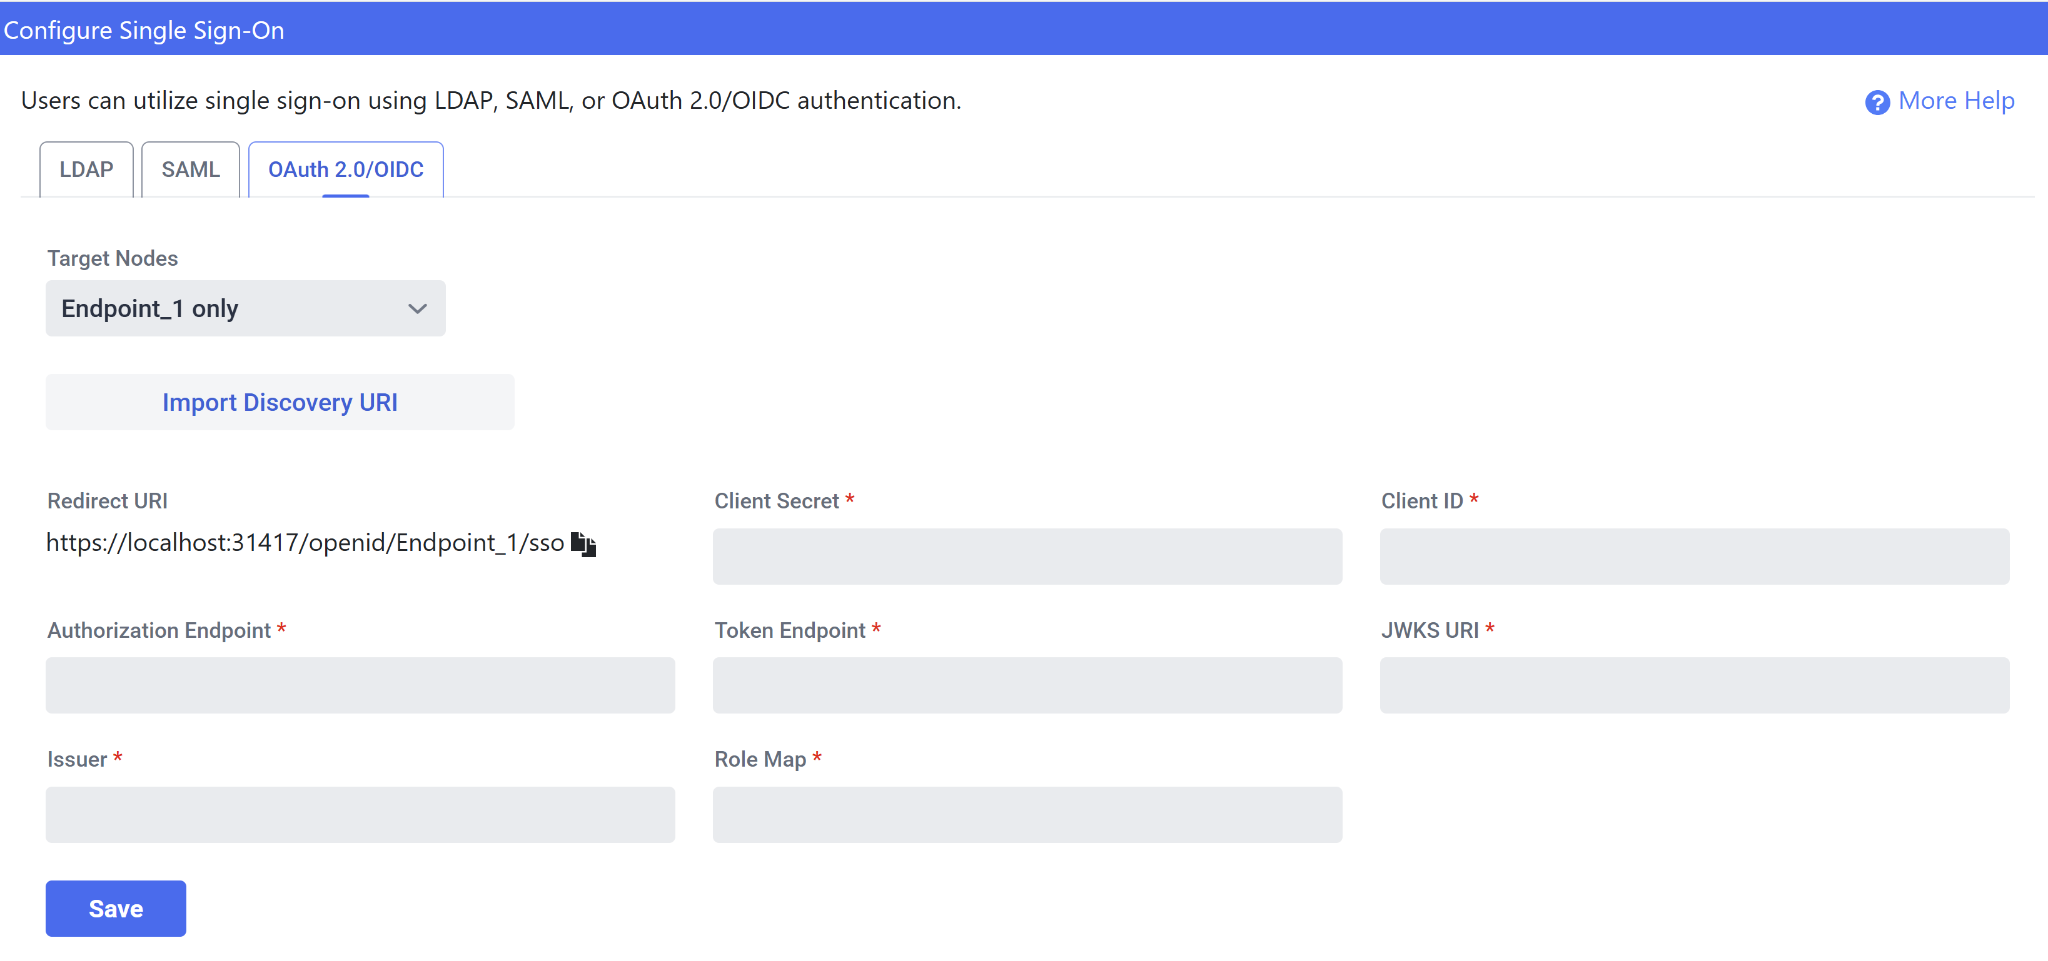
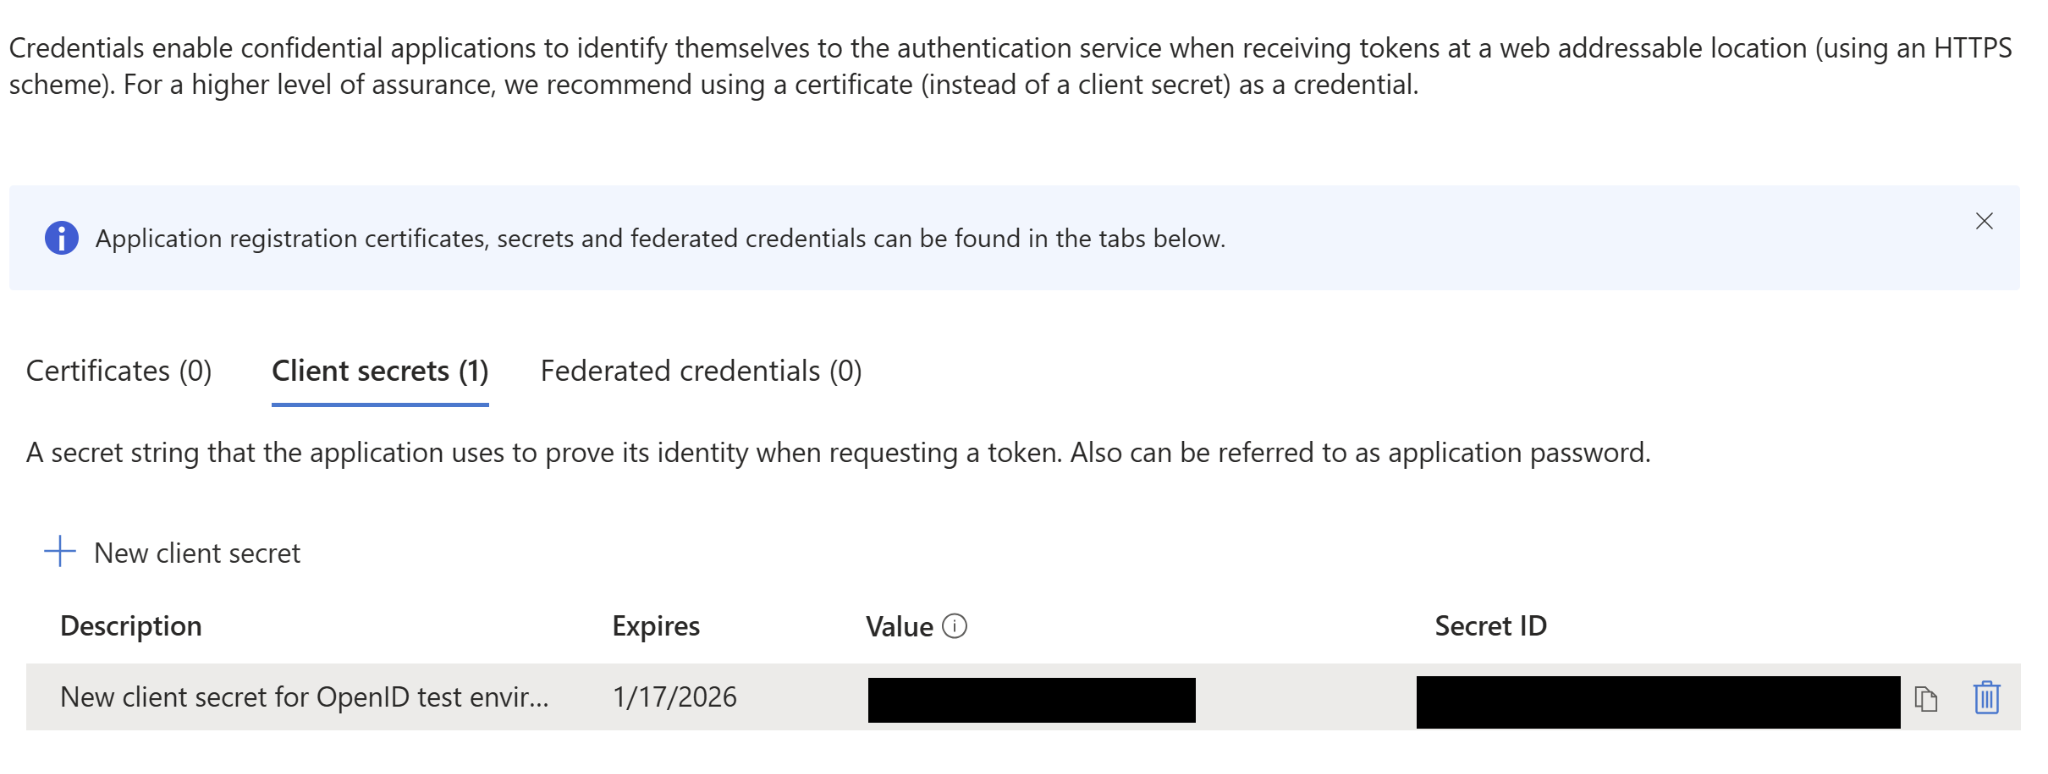
You will then need to make sure your application has a Client Secret configured:
Now that you have configured your identity provider, the next step is to enter your identity provider’s information into SymmetricDS. You can accomplish this via the SymmetricDS Pro web console on the OAuth 2.0/OIDC tab of the Configure Single Sign-On screen.
The Client Secret is the Secret you created in the previous step. The Client ID can be found in the “Overview” section of your application in Microsoft Entra. For 4 of the remaining fields, you are able to fill these out automatically if you know the discovery document URI for your client:
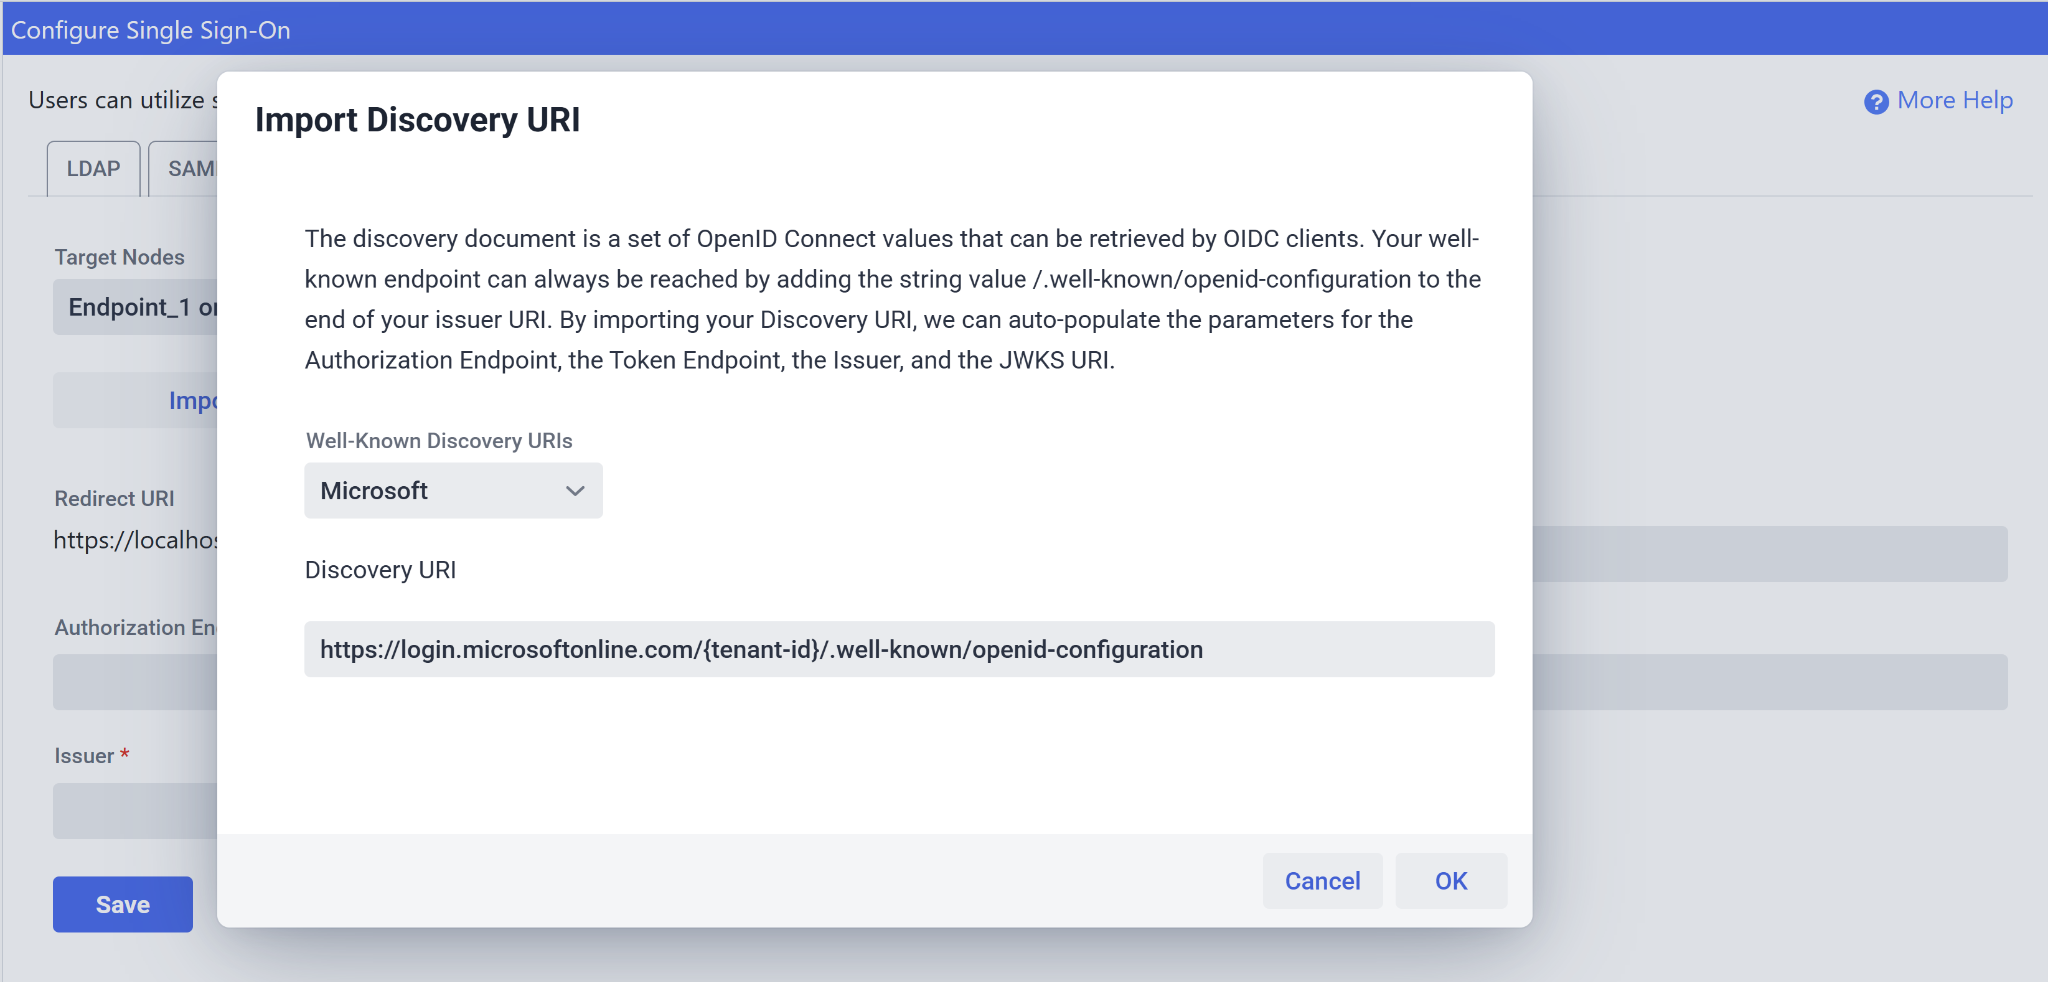
We are using Microsoft, which has Discovery URI’s formatted like above. Change out the {tenant-id} with your application’s Tenant ID, also found in the “Overview” section of Microsoft Entra, then select “OK.” This will populate the Authorization Endpoint, the Token Endpoint, the JWKS URI, and the Issuer field.
The final step to set up OAuth 2.0/OIDC authentication is to configure how you want users to be able to log in to the web console.
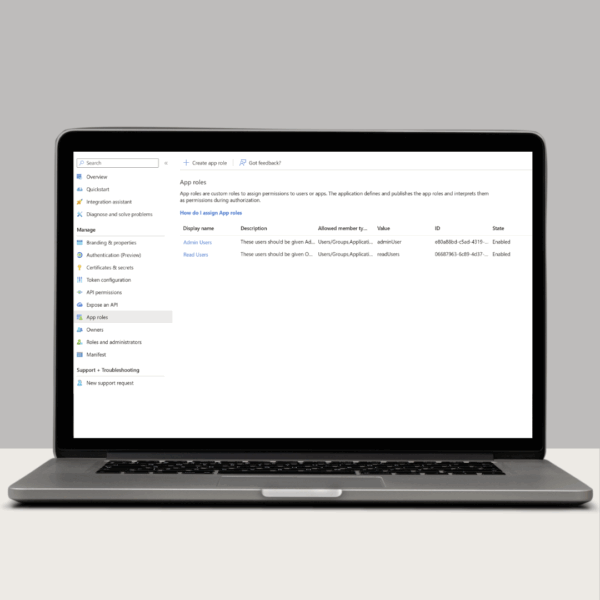
For this example, I’ve set up 2 roles: adminUser and readUsers.

You will need to configure a mapping of your identity provider’s roles to console roles via the Role Group Map. This allows users to log in via OAuth 2.0/OIDC without having a corresponding console user as long as they belong to one of the specified roles. The map must use the following format:
“OAuth2Role1==SYMROLE1″,”OAuth2Role2==SYMROLE2″,”OAuth2 Role3==SYMROLE3”
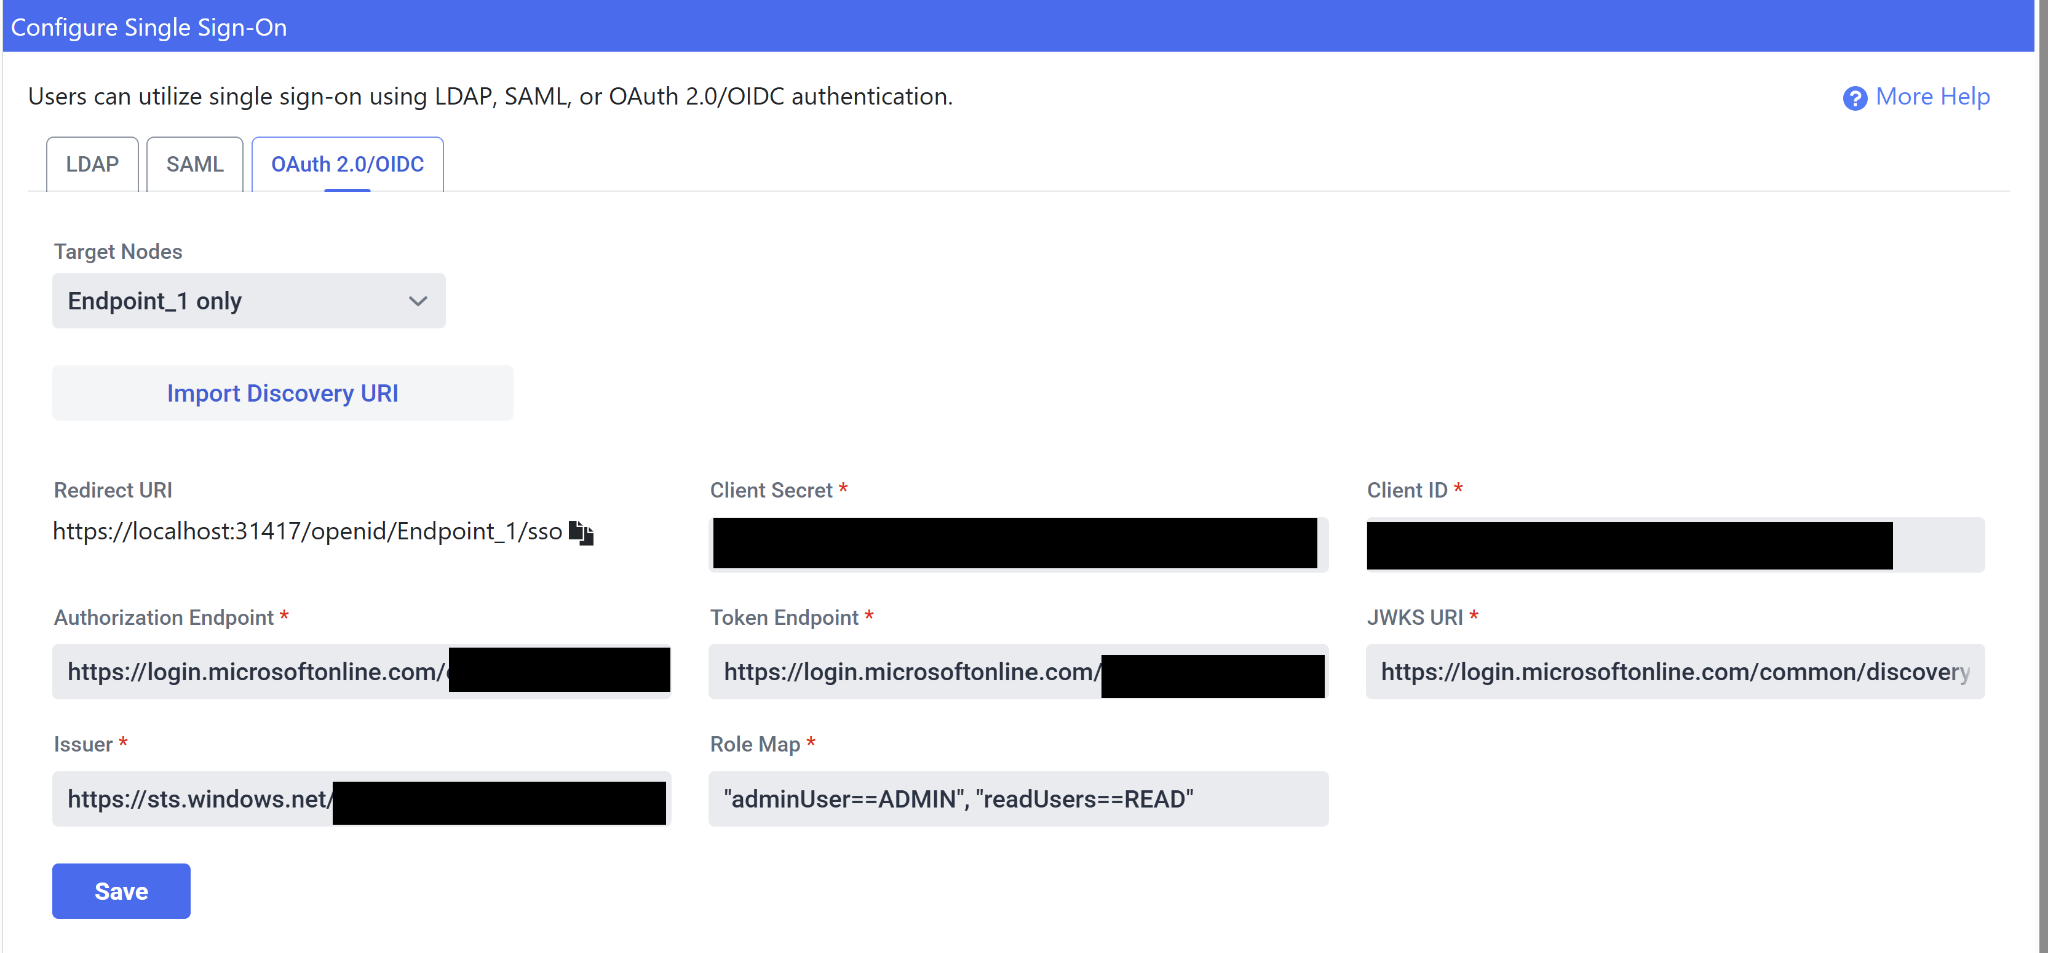
Once you have filled this all out, select the “Save” button to save your configuration.
Now that you’ve configured OAuth 2.0/OIDC authentication, users assigned one of the roles defined in your Role Map can sign in to the SymmetricDS Pro web console by clicking the “Login with OAuth 2.0/OIDC” button on the login screen. This will take them to the identity provider’s login screen where they can sign in and then get redirected back to the web console. If the user has already logged in elsewhere via OAuth 2.0/OIDC, then they will go straight through to the web console without having to enter their credentials.
Version 3.16 of SymmetricDS Pro utilizes OAuth 2.0/OIDC authentication to make it possible to sign in to the web console with the click of a button. To learn more about the other new features included in version 3.16, check out What’s New in SymmetricDS 3.16.