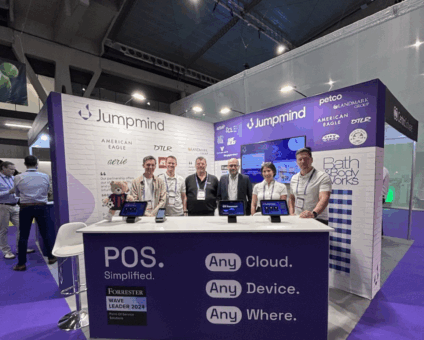
Beyond the Hype: What Retailers Really Want from Tech in 2025 Europe’s biggest retail conference …
![]()
Cloud-native POS platform for seamless omnichannel customer experience.
![]()
A single hub for all promotions campaigns.
- Omnichannel ExperienceCreate seamless customer experiences
- Device IndependencePOS agnostic to form factor or operating system
- Self-CheckoutDo more with fewer associates
- Mobile StoreLeverage POS from anywhere
- POS on the GoEnable associates to sell outside of the store
- Unified PromotionsStreamline and simplify promotion workflows
- CX ConnectAllow customers to engage with POS during checkout
- Composable CommerceCreate the store experience you want
![]()
The most advanced synchronization solution for databases and file systems.
![]()
Data configuration and batch automation across different disparate systems and vendors.
-
Data Replication
- Multi-tier DistributionReplicate thousands of remote locations
- Cloud Database ReplicationCapture live changes from on-premise to the cloud
- High Availability and Load BalancingEnsure 24/7 access to data and scale efficiently with demand
- Analytics and ReportingCapture the whole picture with real-time reporting
- Multi-masterMaintain consistency of data in a peer to peer setup
- Data WarehouseReplicate live and historical data to a warehouse
- MigrationsConduct live data migration with no downtime
-
-
Data Integration
- Master Data ManagementChanges propagate across the entire system, allowing you to maintain a centralized view of all parts of your core business entities.
- Application IntegrationReduce dependencies, complexity, and risk to build a high-performance, data-driven application.
- Web ServicesIntegrate multiple systems using web services or build a business application using a service-oriented architecture.
- Data WarehouseIntegrate disparate data from multiple systems so you can transform data for better business intelligence and reporting.
- Data MigrationConduct live data migration during critical server replacements, storage upgrades, and data center relocations—with no downtime.
- ImplementationIntegration consultants help design, develop, and deploy an implementation of our products.
- DevelopmentThe product developers can add features, enhance existing functionality or build support for new platforms.
- TrainingEngage our experienced training resources to gain in-house knowledge and expertise on Jumpmind products.
- SupportLeverage product engineers to resolve issues, fix defects and provide updates or patches.
- Proof of ConceptDetermine the feasibility of implementing our products and get answers to your questions quickly.
What a fun week it was for women from across the country who came together …
It’s a wrap for the Jumpmind Team at Shoptalk Spring and we could not have …
View all Blog Posts
The new release of SymmetricDS Pro 3.16 data replication software simplifies setup, improves performance, and …
Sybase ASE (more recently known as SAP Adaptive Server Enterprise), announced its end of mainstream …
Azure Blob Storage has become a popular option for storing files in the cloud. And …
View all Blog Posts
Jumpmind Powers Point of Sale and Promotions Execution for Landmark Retail, One of the Largest …
Retail Technology Leader Jumpmind to Enable Mobile Point of Sale and Inventory Management for DTLR/VILLA …
The retailer is charting its next chapter with retail technology modernization to power inspired omnichannel …
View all Customer Stories
43 percent say handling online order returns in-store is a top challenge, and that increases …
After nearly a century in business, the legendary Canadian fashion retailer is retooling to streamline …
The Solution Addresses Modern Retail Challenges with Innovative Promotions to Captivate Inflation-Weary Shoppers NRF 2024, …
View all Blog Posts
![]()
Cloud-native POS platform for seamless omnichannel customer experience.
![]()
A single hub for all promotions campaigns.
![]()
The most advanced synchronization solution for databases and file systems.
![]()
Data configuration and batch automation across different disparate systems and vendors.
-
Data Replication
-
-
Data Integration
-
Retail Retail trends, technology, and enhancing the customer experience
-
Data Thoughts on data matters, dialects, performance, and security
-
Customer Stories How Jumpmind impacts the businesses of our clients
-
Videos & Webinars Watch on demand demos, reviews, and tours of our products
-
Company News Get the scoop on Jumpmind's growth and impact
View all Blog Posts
Quick Start Guide to Using Metl

Are you looking for a simple, web-based integration platform that allows for several different styles of data integration including messaging, file based Extract/Transform/Load (ETL), and remote procedure invocation via Web Services that is easy to use and quick to setup?
In this blog I’m going to walk through the steps to install and run your first flow in Metl in a Windows environment.
Installation
For this example, we will use the simplest way to run Metl which is to run it stand-alone using the internal Jetty container.
1. Download the metl.war file, make sure a Java 8 run-time environment is installed and in the path.
2. In order to run Metl, simply run the following from a command prompt:
java -jar metl.war
3. Once Metl is started, open a web browser and navigate to:
http://localhost:42000/metl/app

Now you can begin to build and execute Metl flows.
Run a Flow
There are several sample flows already created and ready to run. Here I’m going to run the Flat File to Relational Database flow.
1. Navigate to the Design tab and expand the project Samples followed by the Flows folder.
2. Double click the name of the flow ‘Flat File to Relational Database’.
Your screen should look similar to the image below.
This screen shows the flow components and the order of process. The lower window displays properties of a selected component. Some components have additional options that are found by double clicking the component.
3. Click the ‘Run’ button and your screen will look like the following:
This screen shows run-time details and various logging outputs. As the flow executes you will see the status change on each step. Clicking on a Component Name row in the upper right window will display the log results (if applicable) in the lower window.
That’s it, you have installed and run your first Metl flow.
For additional documentation on Metl see:

