Retailers are constantly looking for new ways to generate revenue and stay competitive. One strategy …

![]()
Cloud-native POS platform for seamless omnichannel customer experience.
![]()
A single hub for all promotions campaigns.
![]()
The most advanced synchronization solution for databases and file systems.
![]()
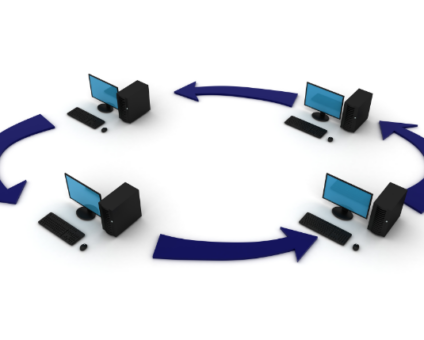
Data configuration and batch automation across different disparate systems and vendors.
Retailers are constantly looking for new ways to generate revenue and stay competitive. One strategy …

Clienteling isn’t a new theory. It can be traced back hundreds of years when shopkeepers …

BOPIS, BORIS, and Curbside Pickup offer consumers and retailers the best of both worlds. …
The SymmetricDS product can synchronize data between over forty different database platforms with out of …

Compare and Repair for SymmetricDS Pro can compare two databases, report on the differences, and …
Mobile replication with Android edge devices in near real time to an on-premise or cloud …
Jumpmind President and CEO Joe Corbin to Lead Panel on Agility at Scale and Digitalizing …

Retail Technology Leader Jumpmind Brings Newfound Interactive and Personalized Digital Engagement to Inspire Shoppers at …

Retail Technology Leader Jumpmind Provides Enhanced Experiential Point of Sale and In-Store Engagement for Build-A-Bear Workshop …
![]()
Cloud-native POS platform for seamless omnichannel customer experience.
![]()
A single hub for all promotions campaigns.
![]()
The most advanced synchronization solution for databases and file systems.
![]()
Data configuration and batch automation across different disparate systems and vendors.

When looking into the different types of data storage options in today’s market, one type of data storage is beginning to stand out: cloud storage. It is simple to use, readily accessible, and easily scalable in almost all instances. Amazon S3 is one of the leading cloud storage options currently available. Given its ability to interface with most of the other Amazon services, this not only gives you the option to store data in the cloud, but also a list of tools and services that can enhance your ability to analyze or transform that data into something more meaningful. One such service is Amazon RDS. This is a service that allows users to host Relational Databases on Amazon servers. Amazon S3 allows users to upload CSV files, along with other types of files, to buckets. Once in these buckets, Amazon RDS can then pull the files in, and convert them into database rows or tables. In this article, we will be talking about how to upload to Amazon S3 using SymmetricDS.
Starting in 3.14, SymmetricDS will have the availability to select Amazon S3 as a dialect. This will be considered a Load-Only database, and will allow users to upload a CSV file of database inserts and updates into their S3 bucket of choice. Once in the bucket, it can be used to populate an RDS database such as PostgreSQL or MySQL. In order for SymmetricDS to work with Amazon S3, there is some setup involved on the Amazon side.
Setting up S3 to work with SymmetricDS:
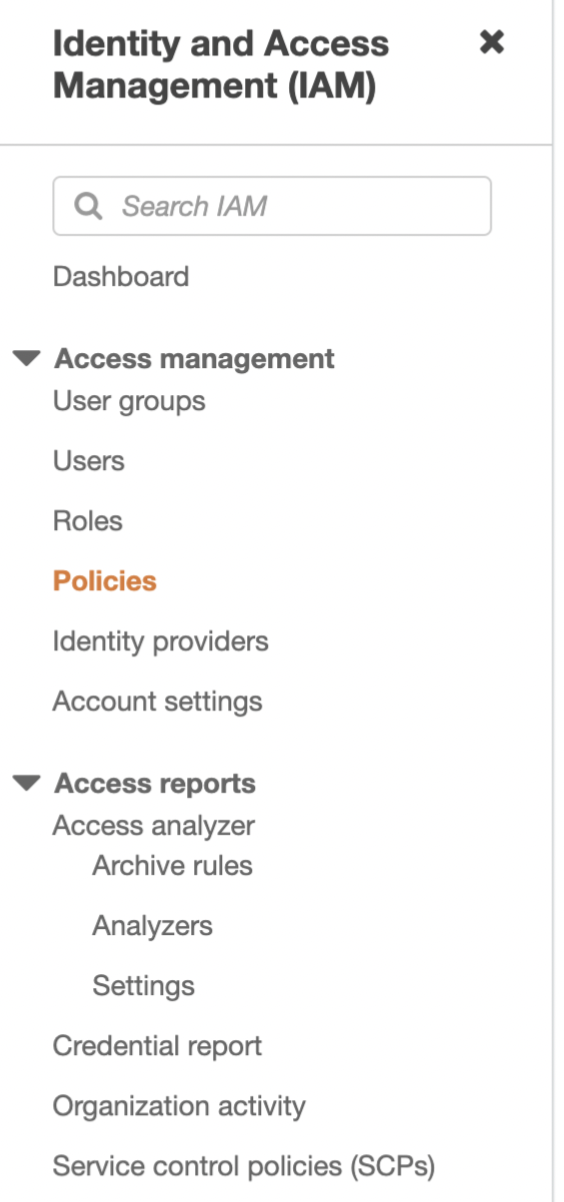
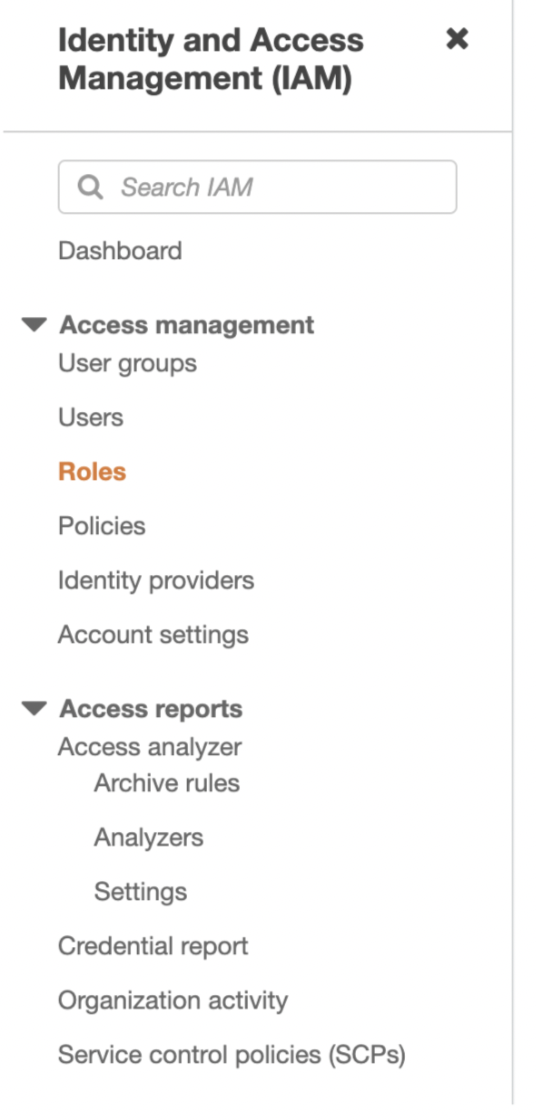
Before SymmetricDS will work with S3, we first have to do some setup on the Amazon side. Before we can select Amazon S3 on the SymmetricDS side, we must first set up some of the credentials and settings needed to allow SymmetricDS to access our S3 bucket. The first thing you need to do is login to the AWS IAM Management Console. On the left side of the screen, there will be a list of different locations. Click on the Policies option.
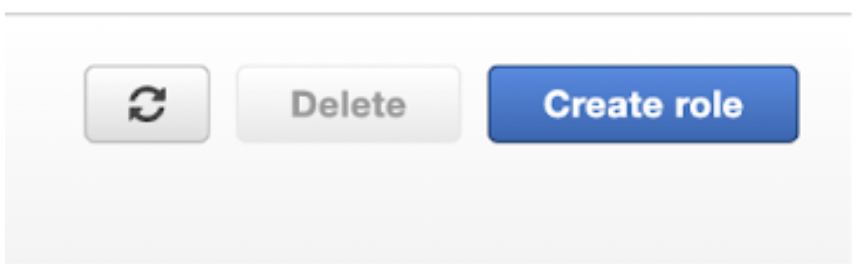
Once there, in the top right of the screen, there will be a ‘Create Policy’ button. Click that.

Once that has been clicked, it will pop up a window, allowing you to set up a policy. You will see a set of tabs at the top of the pop up. Select the JSON tab, and paste the following inside of the brackets after ‘Statement’:
{
“Sid”: “s3import”,
“Action”: [
“s3:GetObject”,
“s3:ListBucket”
],
“Effect”: “Allow”,
“Resource”: [
“arn:aws:s3:::your-s3-bucket“,
“arn:aws:s3:::your-s3-bucket/*”
]
}
The code above can be found in the Amazon documentation, found here:
https://docs.aws.amazon.com/AmazonRDS/latest/UserGuide/USER_PostgreSQL.S3Import.html
After doing that, continue through the prompts and click ‘Create Policy’. After the policy has been created, go to the left side of the screen again and select the Roles option.
Similar to the Policies screen, you will see a ‘Create role’ button in the top right – click that.
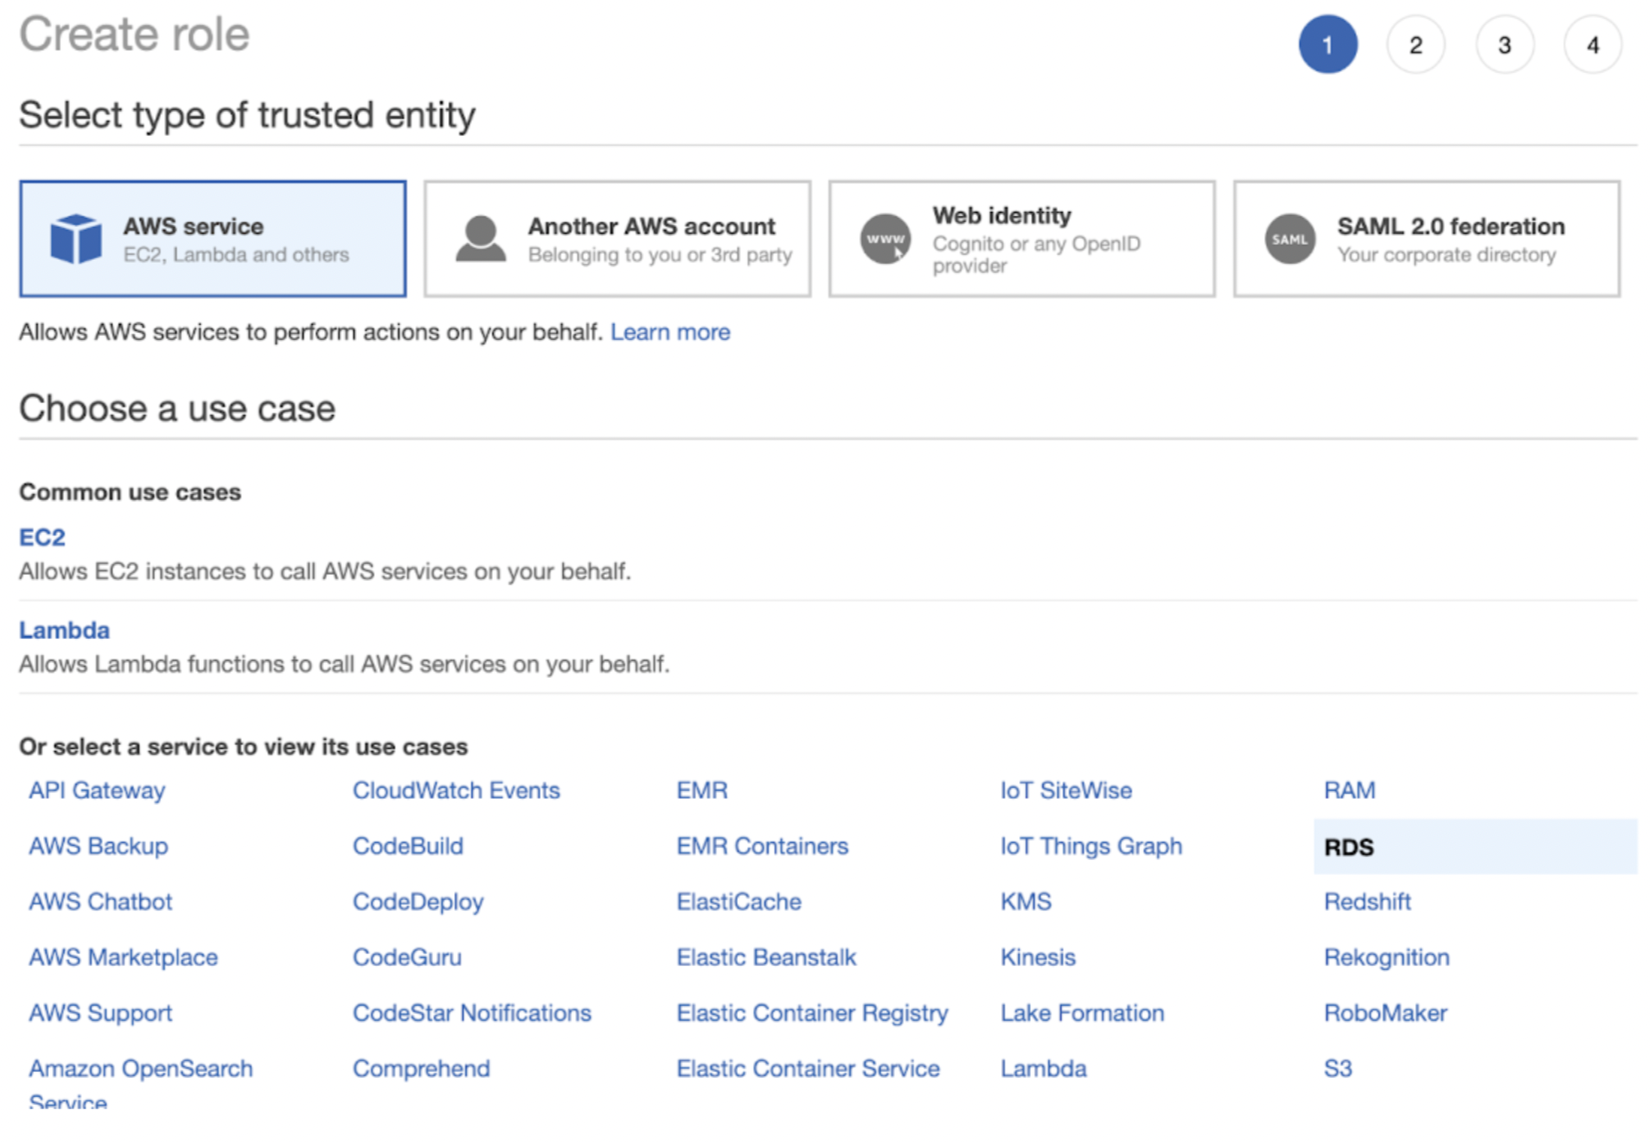
After clicking on ‘Create role’, there will be several options put on the screen. Select the AWS service box at the top, and then the RDS option under the use cases section.
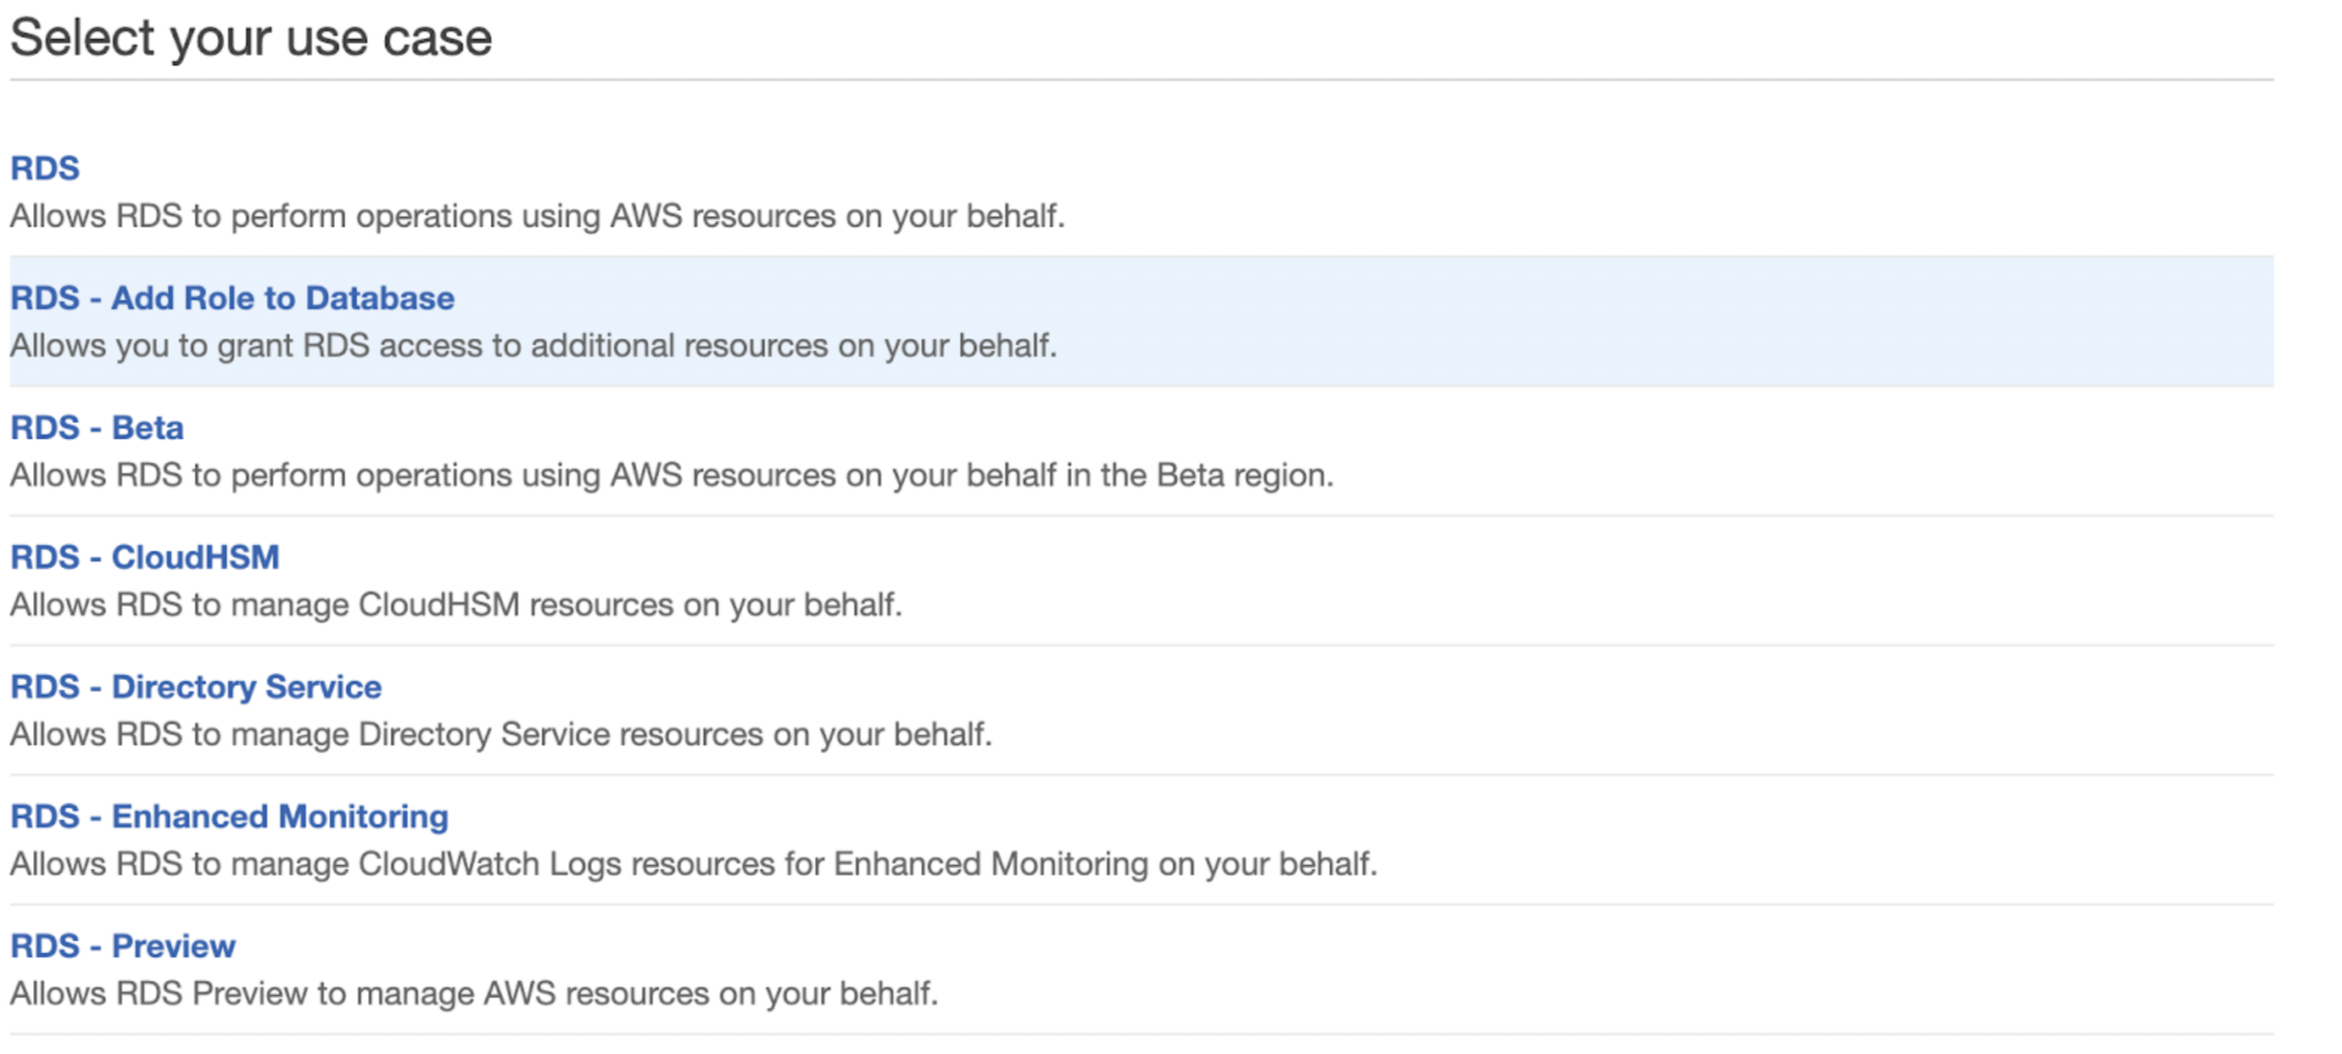
After those have been selected, it will take you to the bottom of the screen to select a more specific use case. Select the ‘RDS- Add Role to Database’ option, and continue to the next screen.
Here, you will select permission policies that you want the role to have. We will be selecting the custom policy we made earlier in this document.
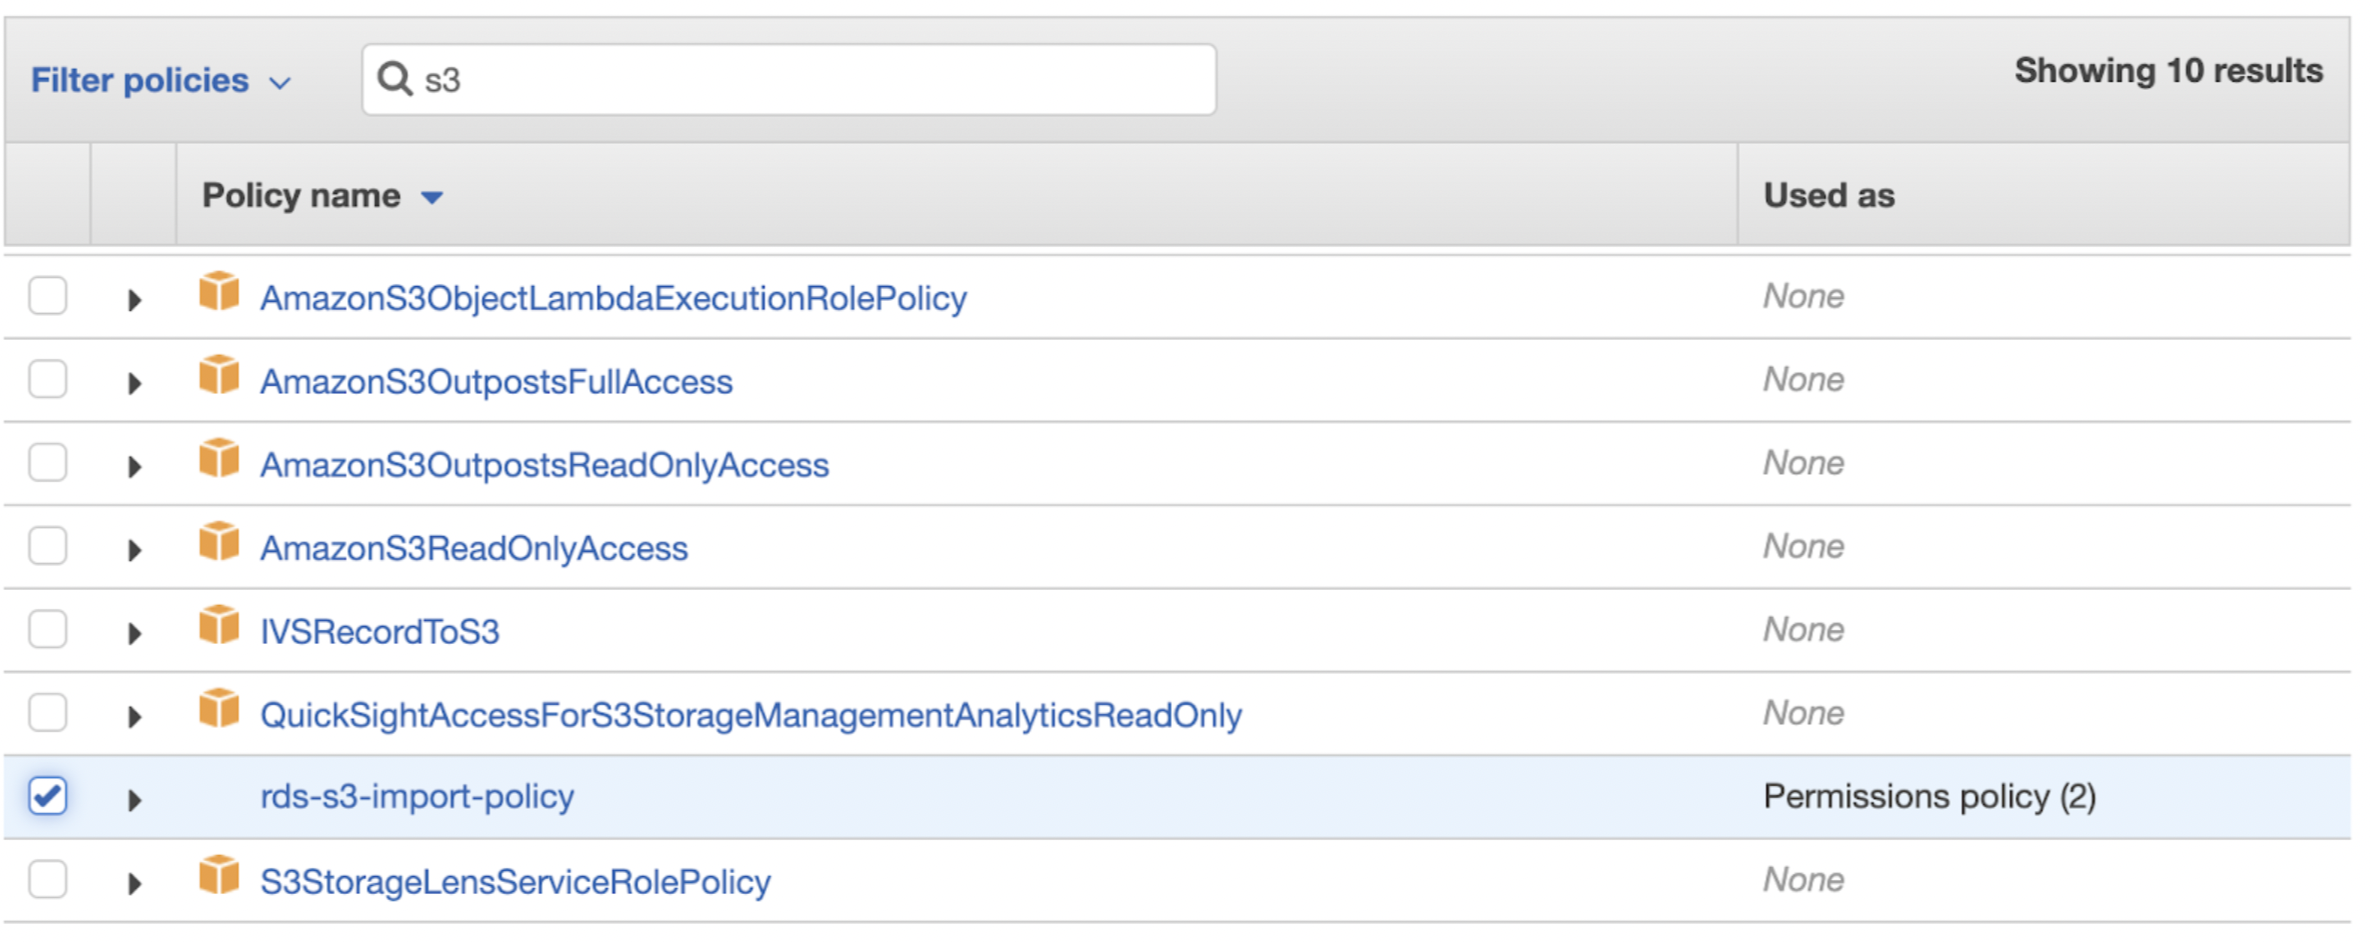
After selecting the permissions, continue through the screens and finish creating the new role. Once that has been completed, head over to the database on Amazon RDS. Once the database is selected, at the bottom of the Connectivity & security tab, you will see a Manage IAM roles section.
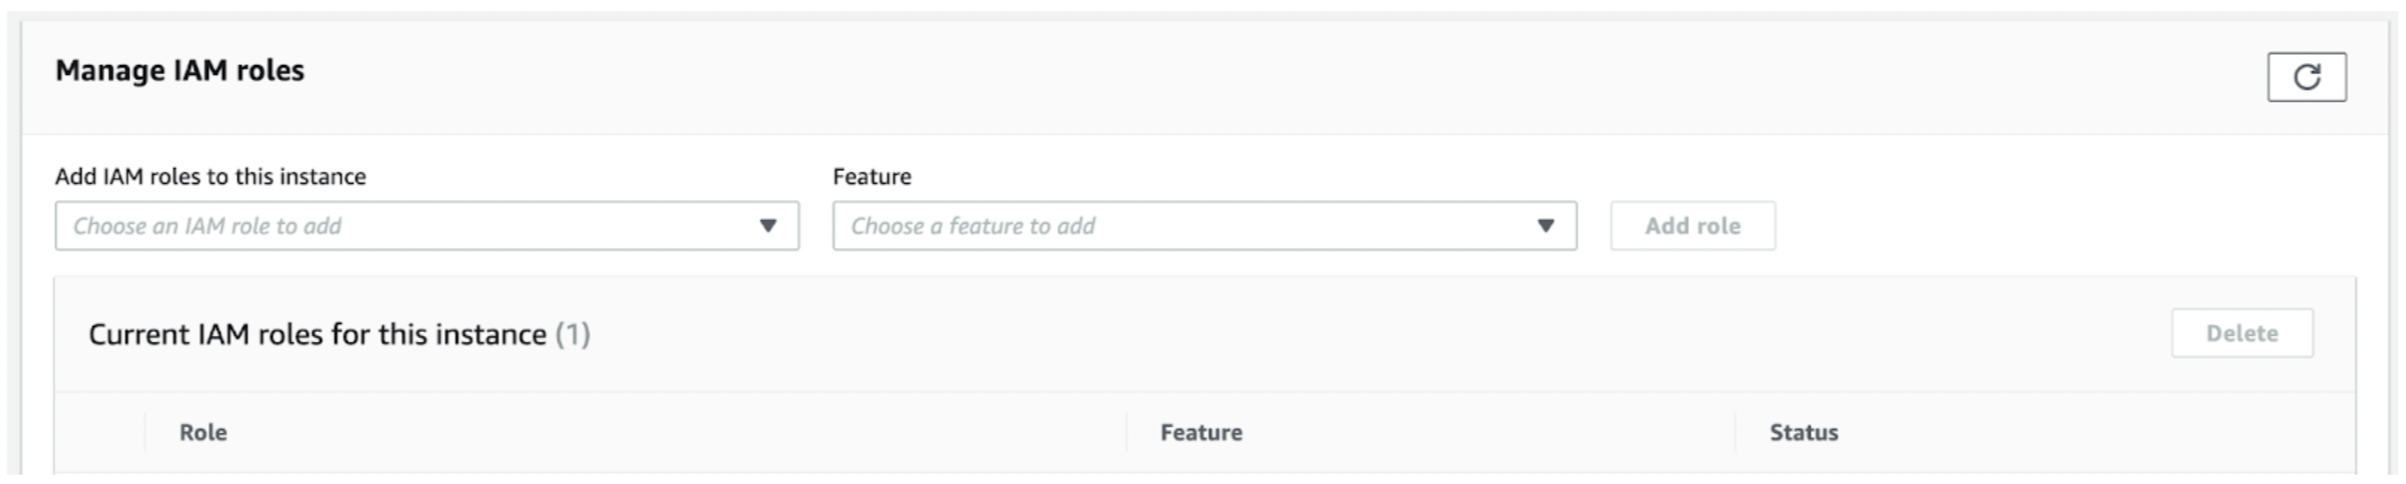
Here, you will select the role we just created. Under the Feature section, you will select s3Import, allowing the role to import data from S3.

Once those are both selected, click ‘Add role’ and it will appear under the roles section. Your RDS database now has the permissions to pull from the S3 bucket that has been setup!
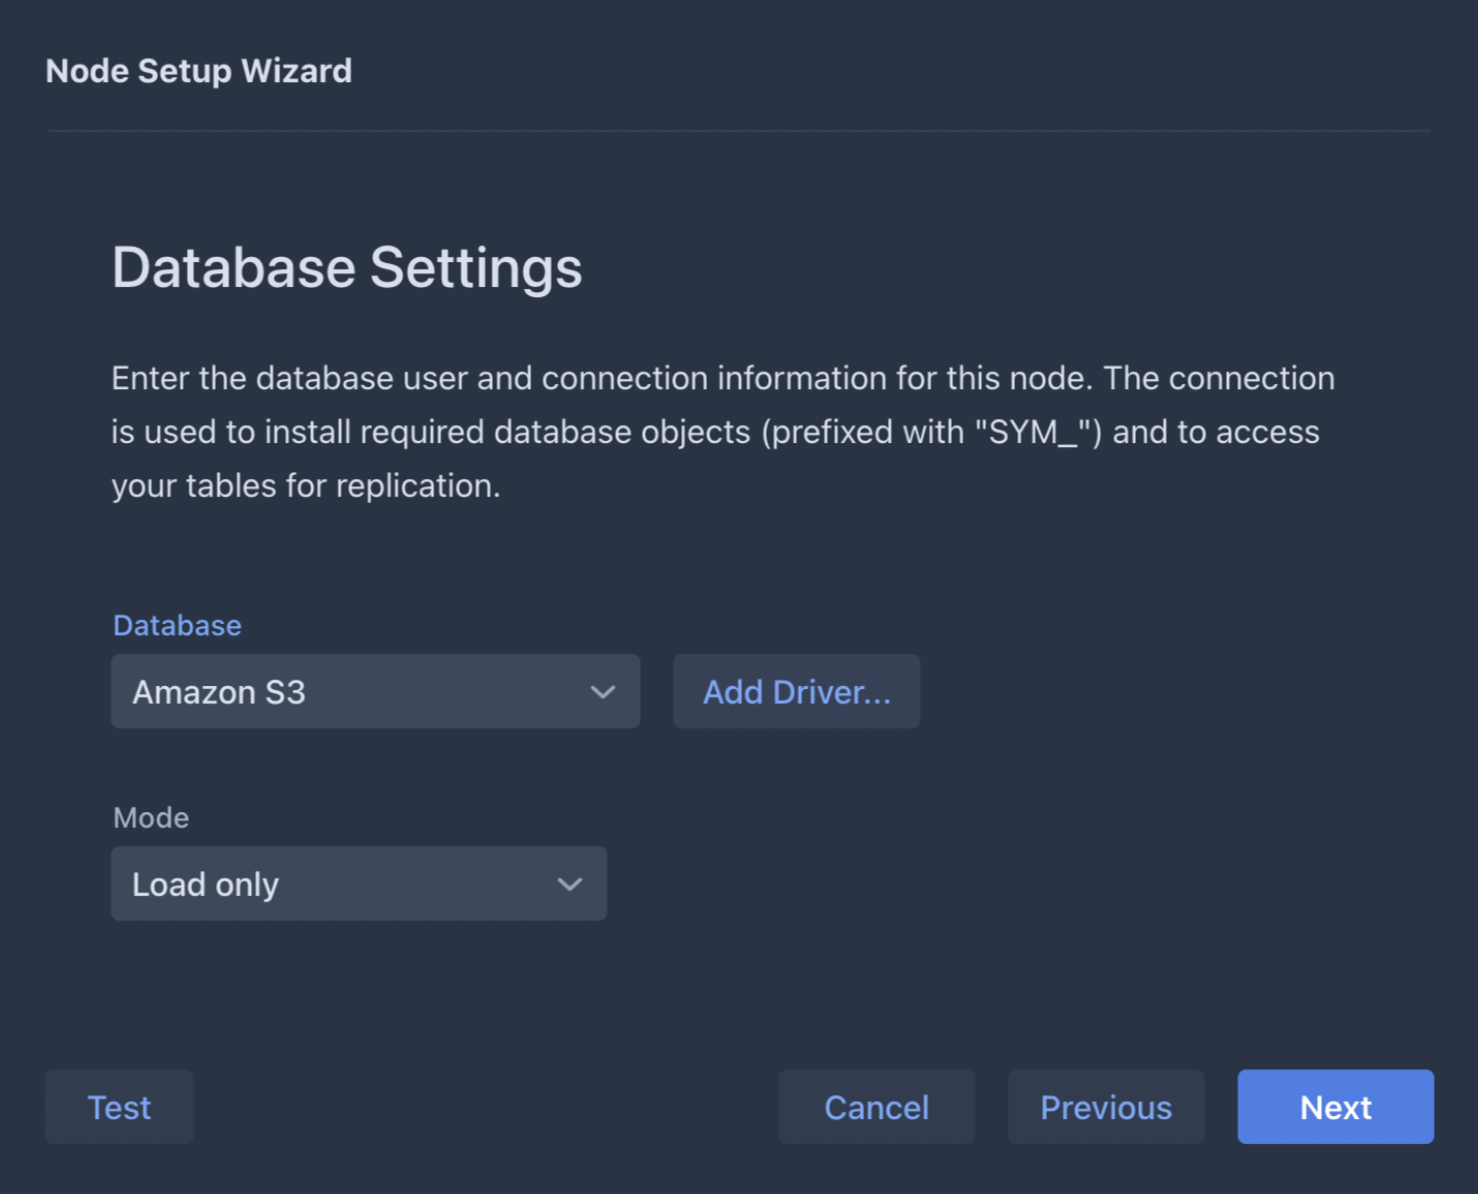
After setting everything up so that your RDS database can communicate with S3, all that is left is to add the S3 bucket to SymmetricDS.
After selecting Amazon S3, you will then have to fill out a few more fields to ensure SymmetricDS can reach your S3 bucket. The fields are as follows:
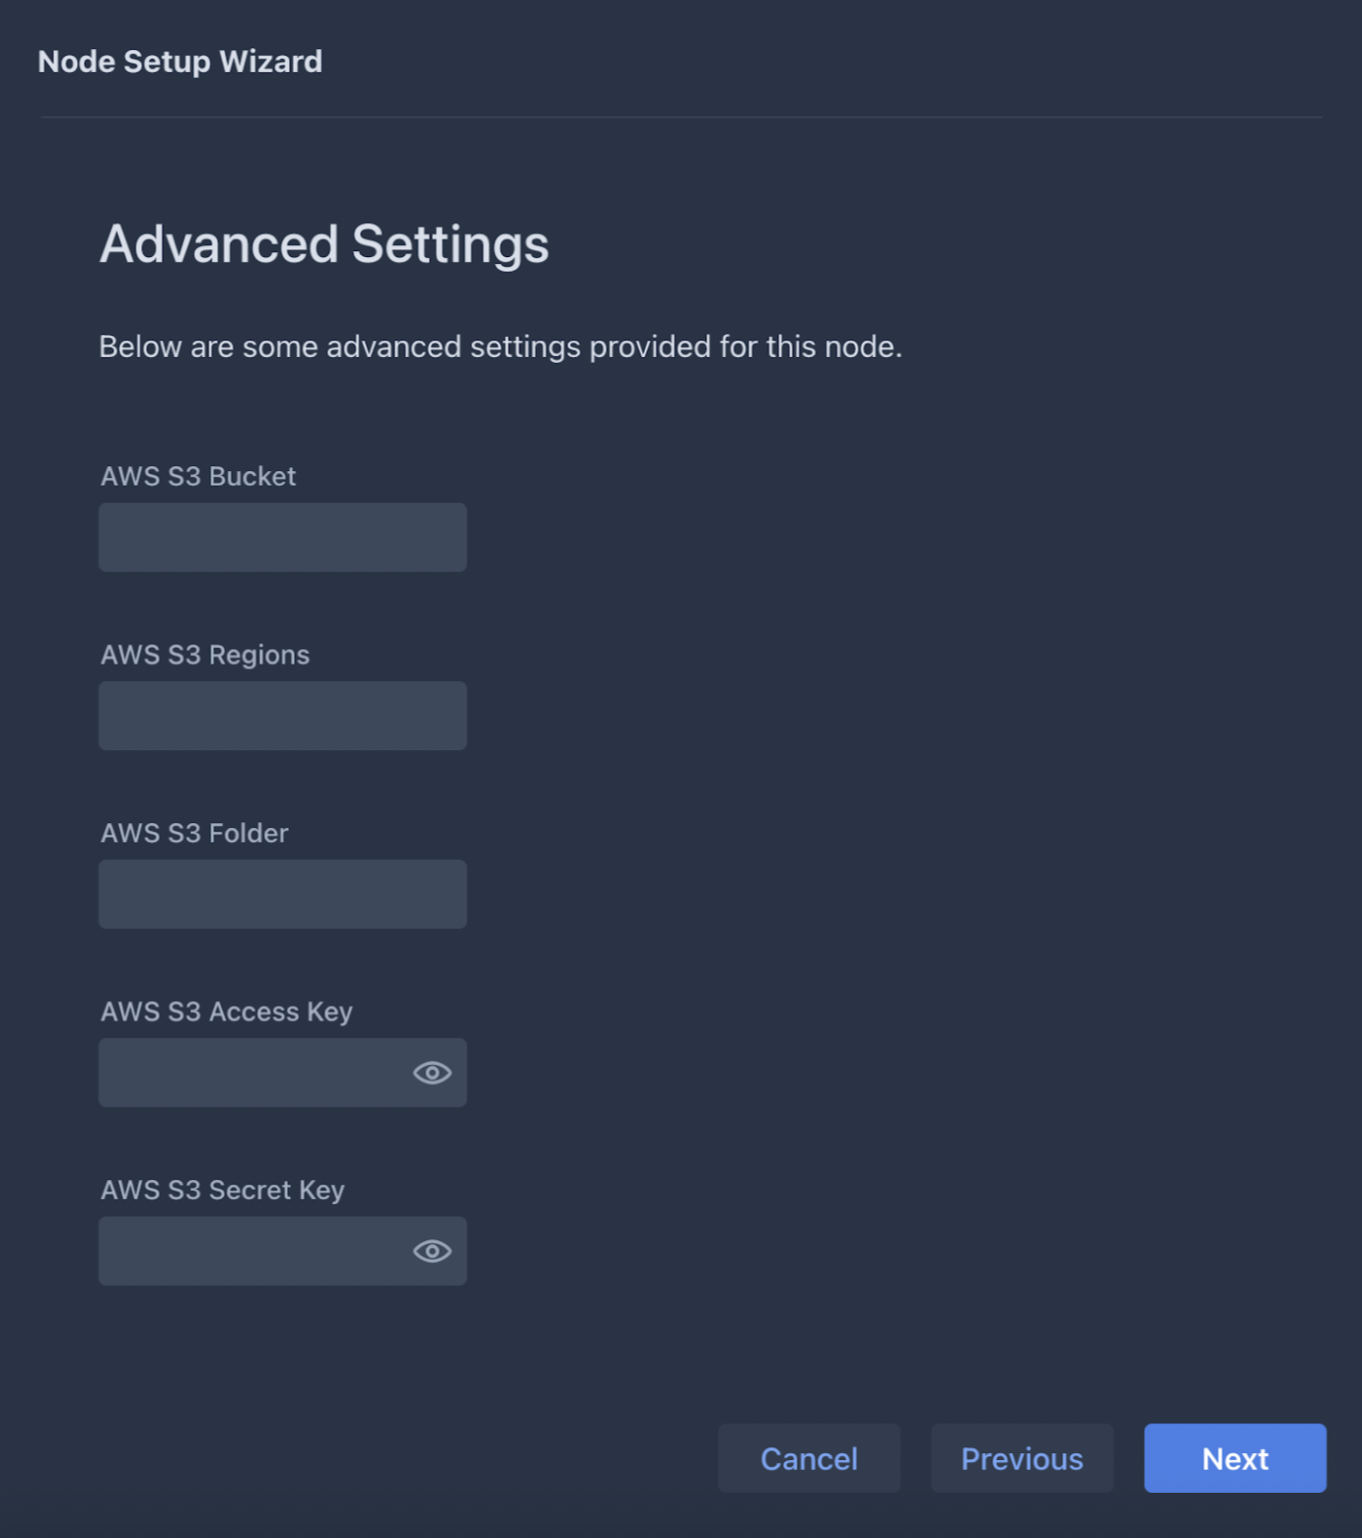
Make sure that the AWS user Access key and Secret key are for a user that has permission to upload files to S3. After filling out all of the fields in the image above, SymmetricDS will connect to the S3 bucket, and start loading any inserts or updates that it captures!
By adding S3 to the SymmetricDS repertoire, it allows users to seamlessly transition their data into a cloud database. S3 has immense scalability and durability, and can keep your data safe and secure with ease. SymmetricDS will act as the perfect tool to transition your database into a robust and reputable cloud storage system simply.