Retailers are constantly looking for new ways to generate revenue and stay competitive. One strategy …

![]()
Cloud-native POS platform for seamless omnichannel customer experience.
![]()
A single hub for all promotions campaigns.
![]()
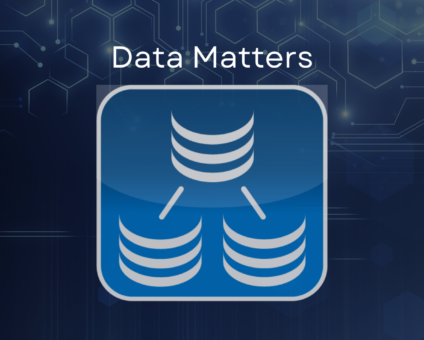
The most advanced synchronization solution for databases and file systems.
![]()
Data configuration and batch automation across different disparate systems and vendors.
Retailers are constantly looking for new ways to generate revenue and stay competitive. One strategy …

Clienteling isn’t a new theory. It can be traced back hundreds of years when shopkeepers …

BOPIS, BORIS, and Curbside Pickup offer consumers and retailers the best of both worlds. …
The SymmetricDS product can synchronize data between over forty different database platforms with out of …

Compare and Repair for SymmetricDS Pro can compare two databases, report on the differences, and …
Mobile replication with Android edge devices in near real time to an on-premise or cloud …

Jumpmind President and CEO Joe Corbin to Lead Panel on Agility at Scale and Digitalizing …

Retail Technology Leader Jumpmind Brings Newfound Interactive and Personalized Digital Engagement to Inspire Shoppers at …
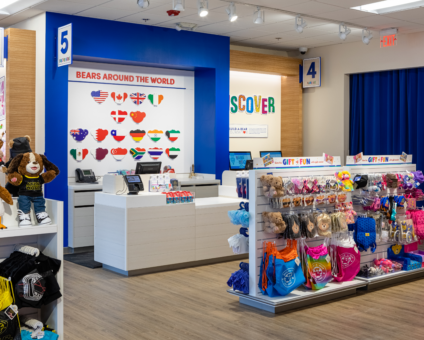
Retail Technology Leader Jumpmind Provides Enhanced Experiential Point of Sale and In-Store Engagement for Build-A-Bear Workshop …
![]()
Cloud-native POS platform for seamless omnichannel customer experience.
![]()
A single hub for all promotions campaigns.
![]()
The most advanced synchronization solution for databases and file systems.
![]()
Data configuration and batch automation across different disparate systems and vendors.

Are you looking for a simple, web-based integration platform that allows for several different styles of data integration including messaging, file based Extract/Transform/Load (ETL), and remote procedure invocation via Web Services that is easy to use and quick to setup?
In this blog I’m going to walk through the steps to install and run your first flow in Metl in a Windows environment.
Installation
For this example, we will use the simplest way to run Metl which is to run it stand-alone using the internal Jetty container.
1. Download the metl.war file, make sure a Java 8 run-time environment is installed and in the path.
2. In order to run Metl, simply run the following from a command prompt:
java -jar metl.war
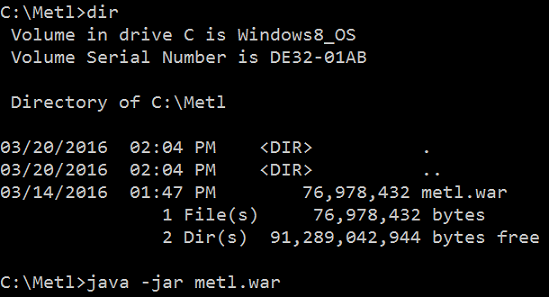
3. Once Metl is started, open a web browser and navigate to:
http://localhost:42000/metl/app

Now you can begin to build and execute Metl flows.
Run a Flow
There are several sample flows already created and ready to run. Here I’m going to run the Flat File to Relational Database flow.
1. Navigate to the Design tab and expand the project Samples followed by the Flows folder.
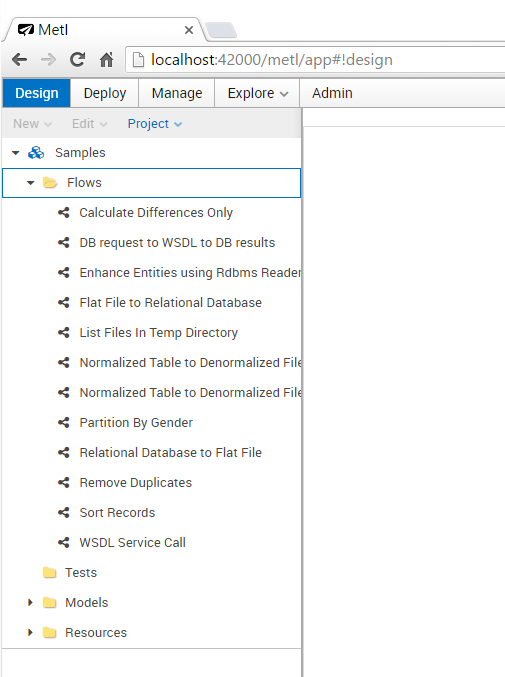
2. Double click the name of the flow ‘Flat File to Relational Database’.
Your screen should look similar to the image below.
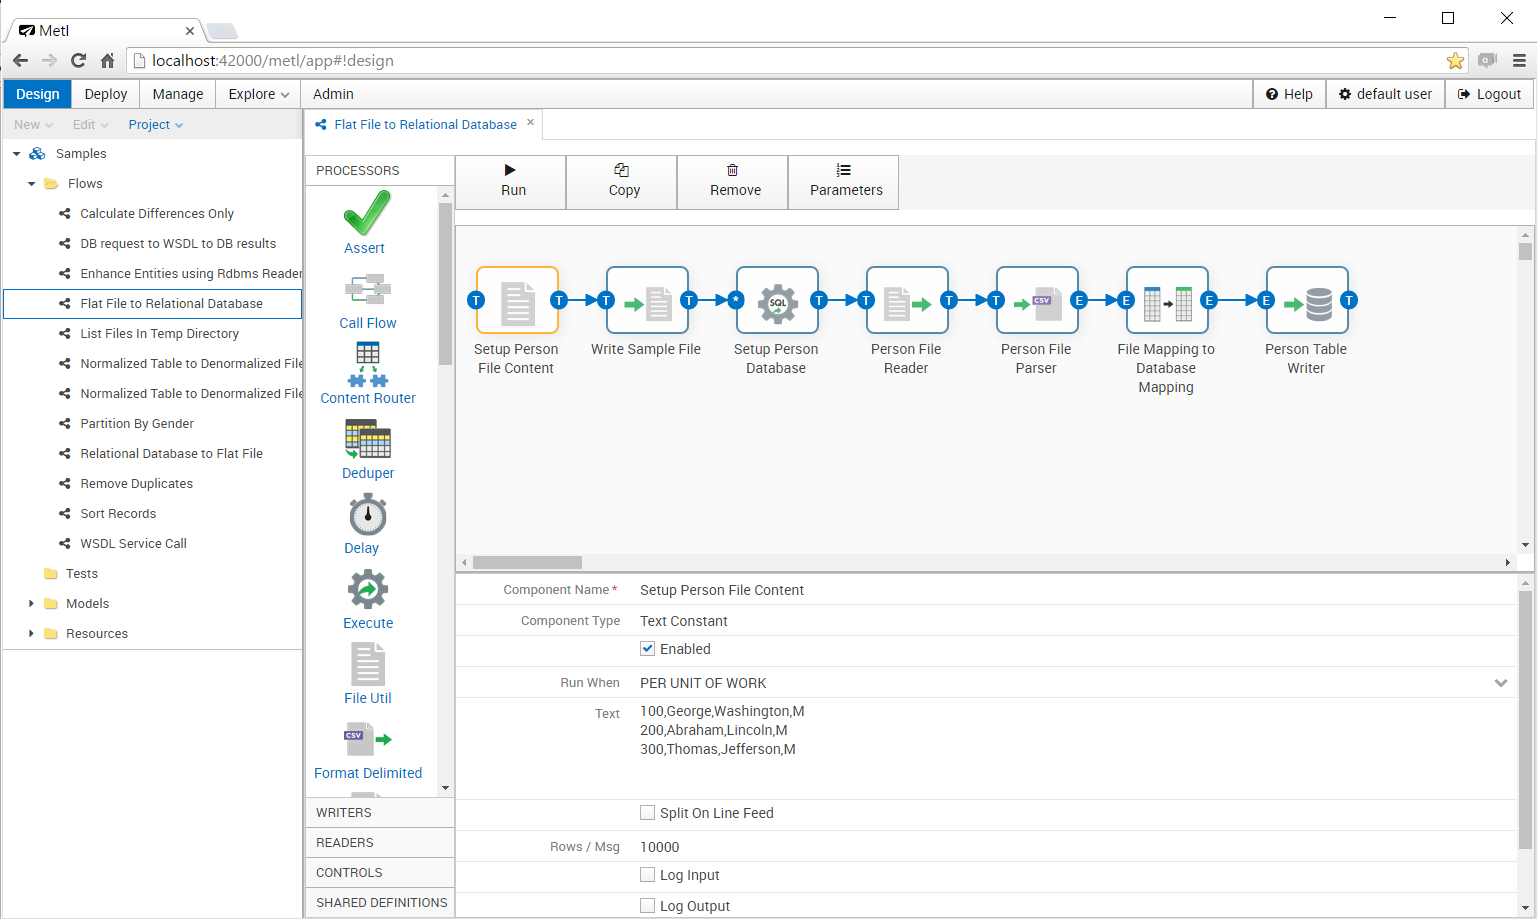
This screen shows the flow components and the order of process. The lower window displays properties of a selected component. Some components have additional options that are found by double clicking the component.
3. Click the ‘Run’ button and your screen will look like the following:
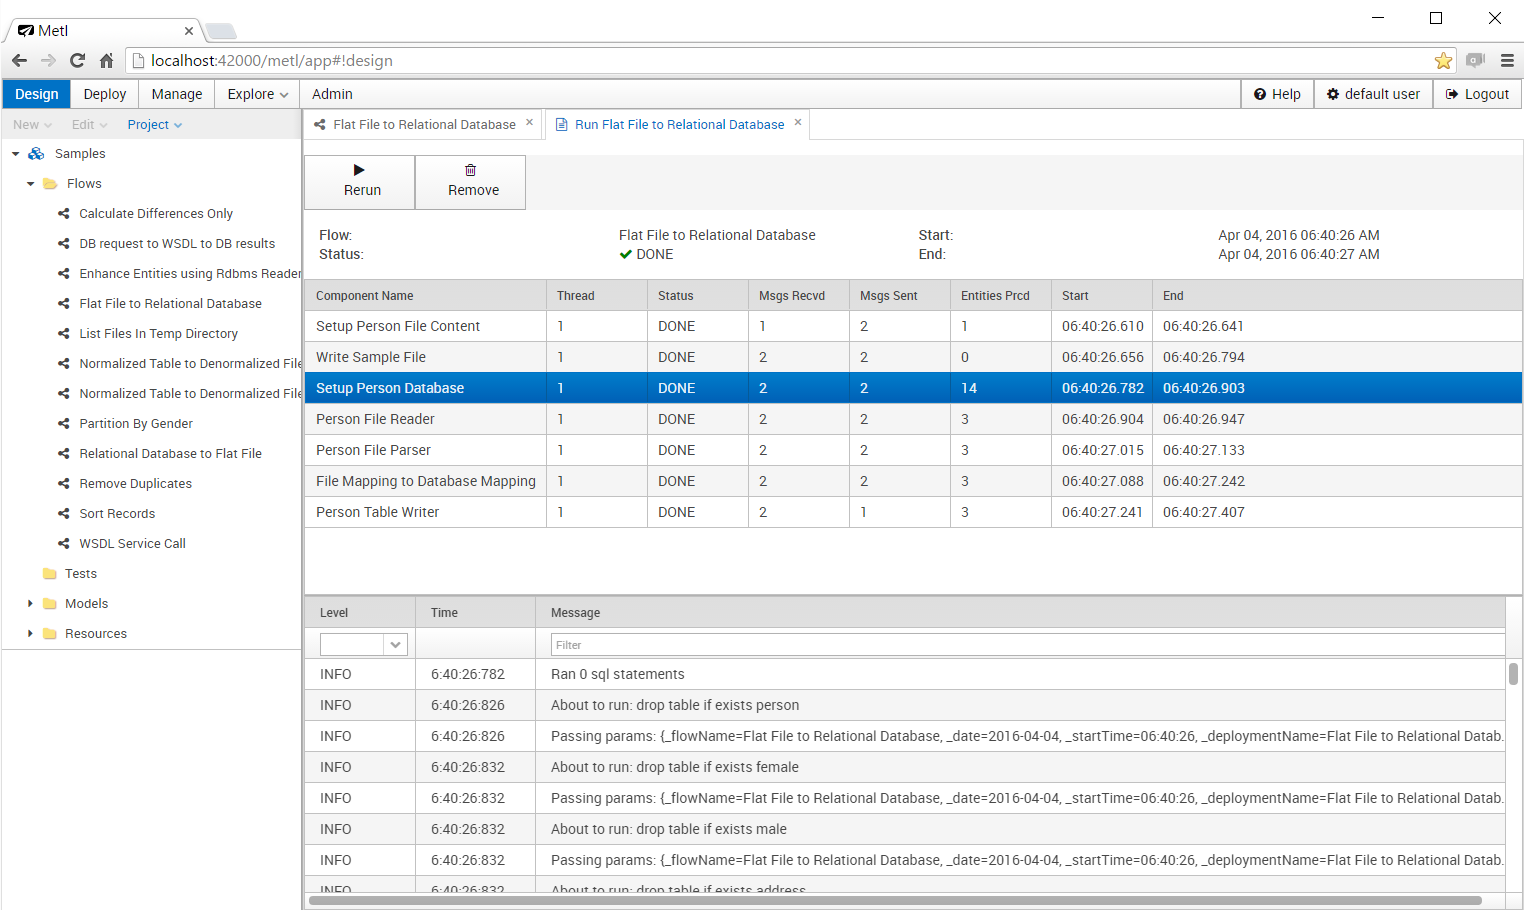
This screen shows run-time details and various logging outputs. As the flow executes you will see the status change on each step. Clicking on a Component Name row in the upper right window will display the log results (if applicable) in the lower window.
That’s it, you have installed and run your first Metl flow.
For additional documentation on Metl see: